Appearance
RabbitMQ 学习笔记
一些概念
Broker :RabbitMQ服务。
virtual host: 其实就是分组。
Connection:连接,生产者消费者与Broker之间的TCP连接。
Channel:网络信道,轻量级的Connection,使用Channel可以减少Connection的建立,减少开销。
Message:消息,由 Properties和 Body组成,Properties 可以对消息的优先级、延迟等特性进行记录,Body存储消息体的内容。
Exchange:交换机,没有消息存储功能,负责分发消息。
Binding:Exchange和Queue之间的虚拟连接,其中可以包含Routing Key。
Routing Key:路由规则,用于确定如何分发、接收消息。
Queue:消息队列,保存消息并将其转发给消费者进行消费。
安装
Windows安装
安装erLang语言
进入官网
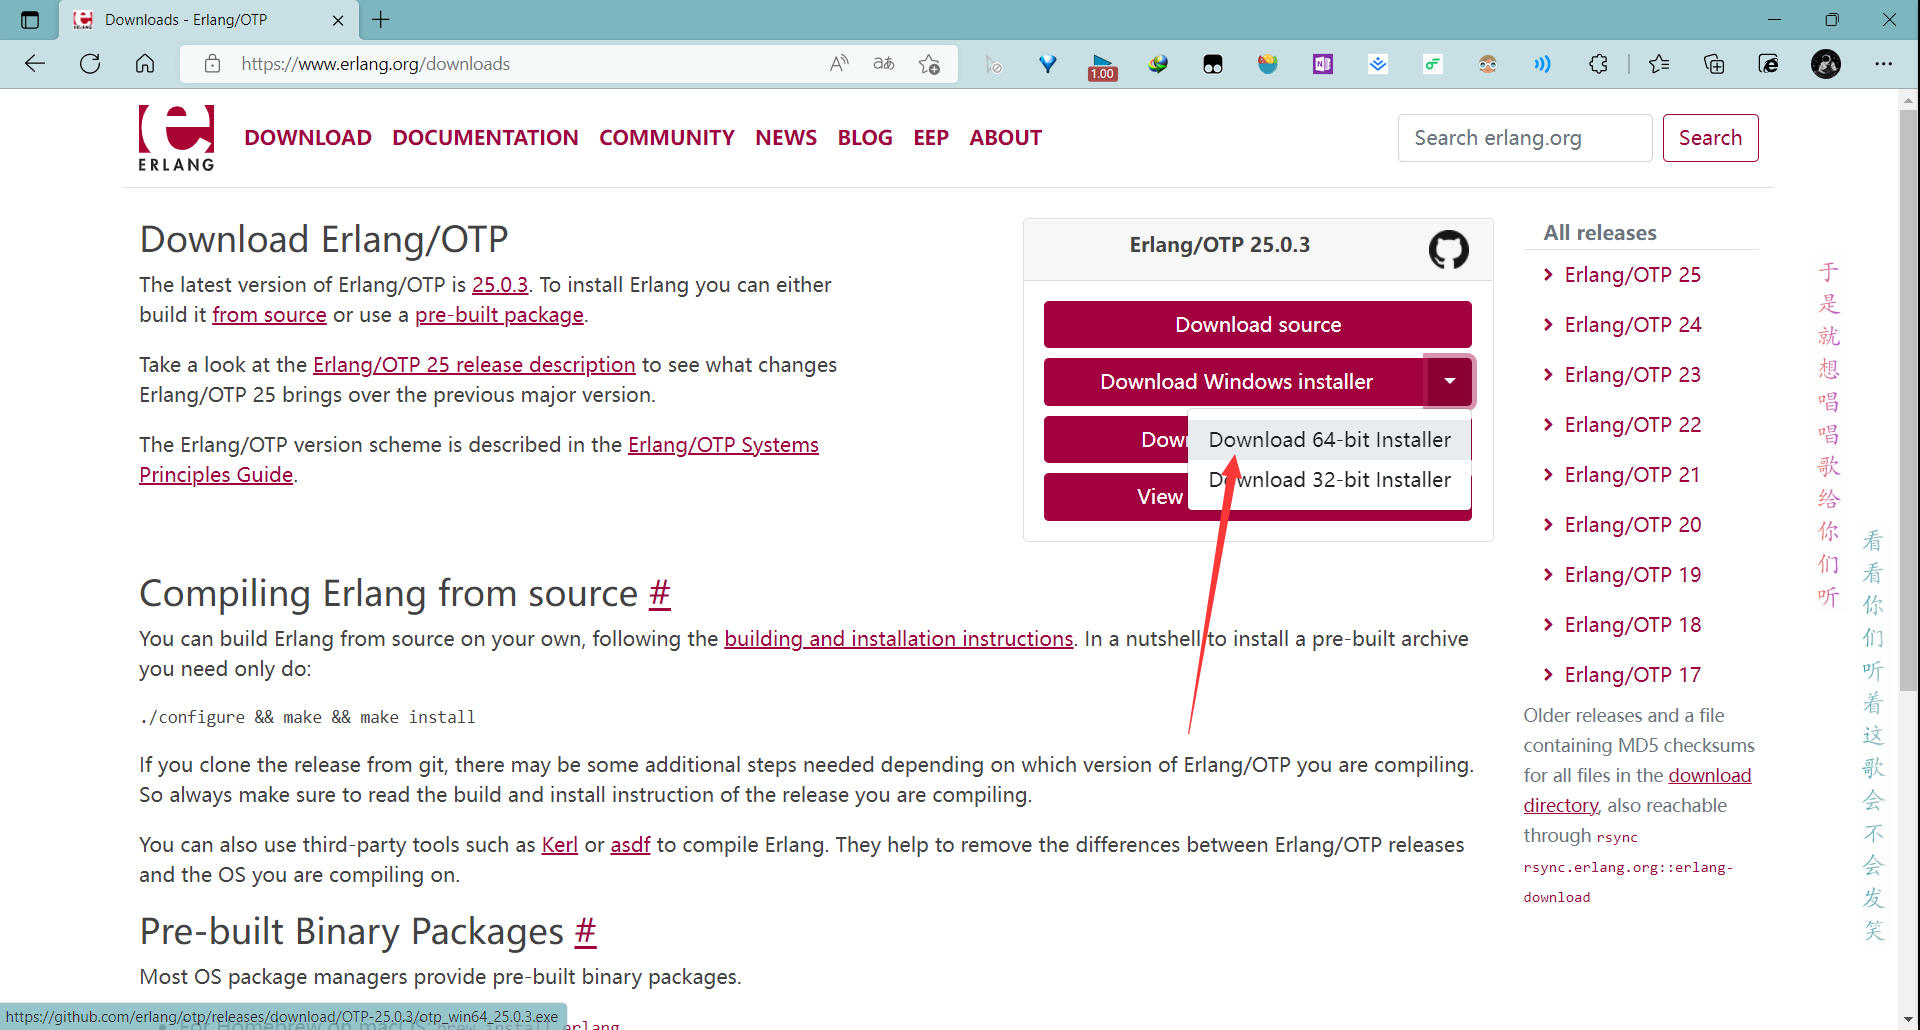
下载完之后一直下一步安装即可,安装完成后进入目录,配置环境变量
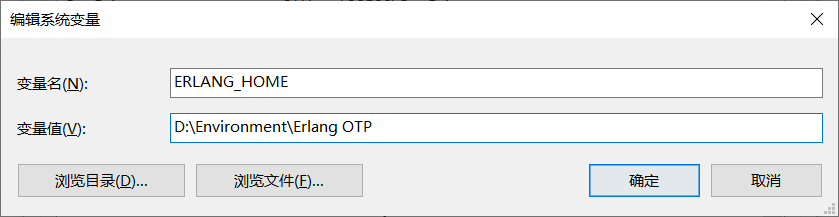
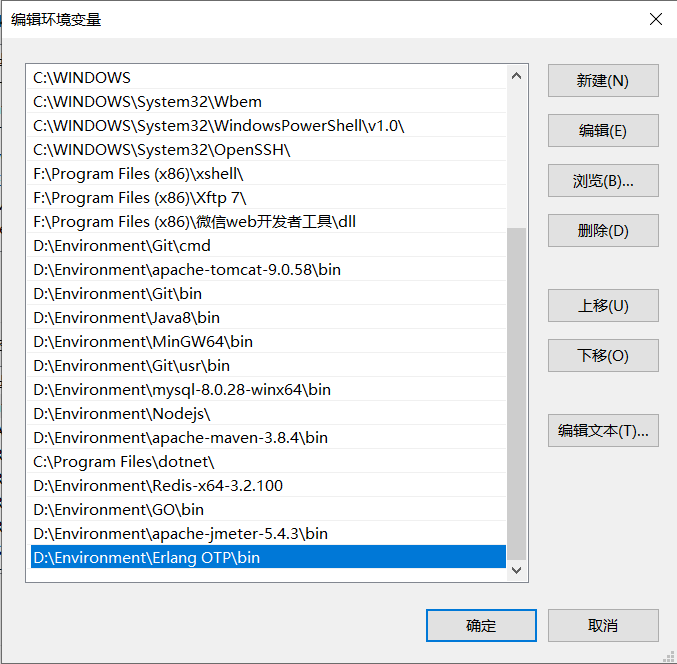
安装RabbitMQ服务端
Release RabbitMQ 3.7.3 · rabbitmq/rabbitmq-server (github.com)
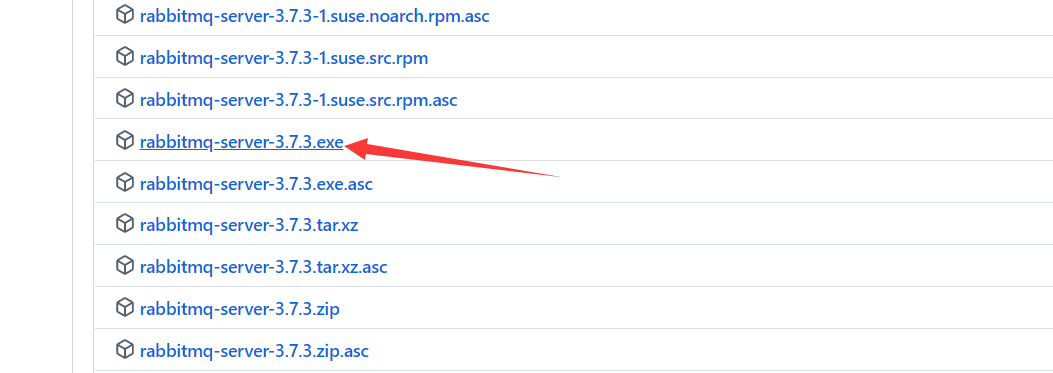
一直下一步安装即可
安装完成后打开安装目录,进入到这个文件夹打开命令行
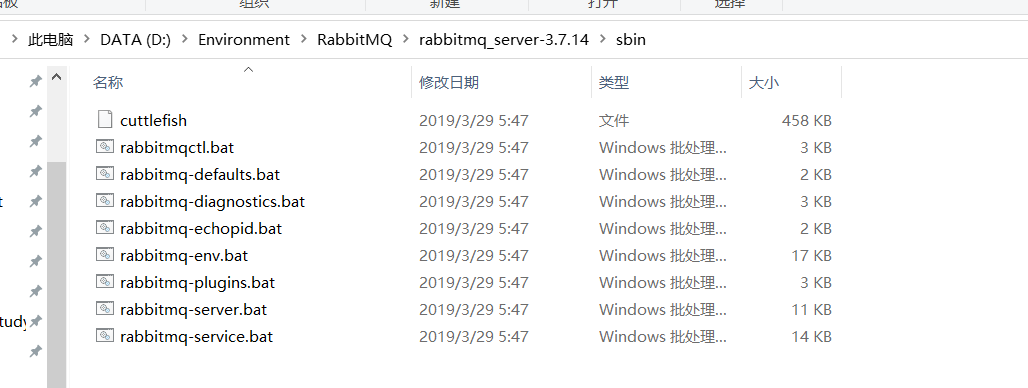
输入命令安装插件
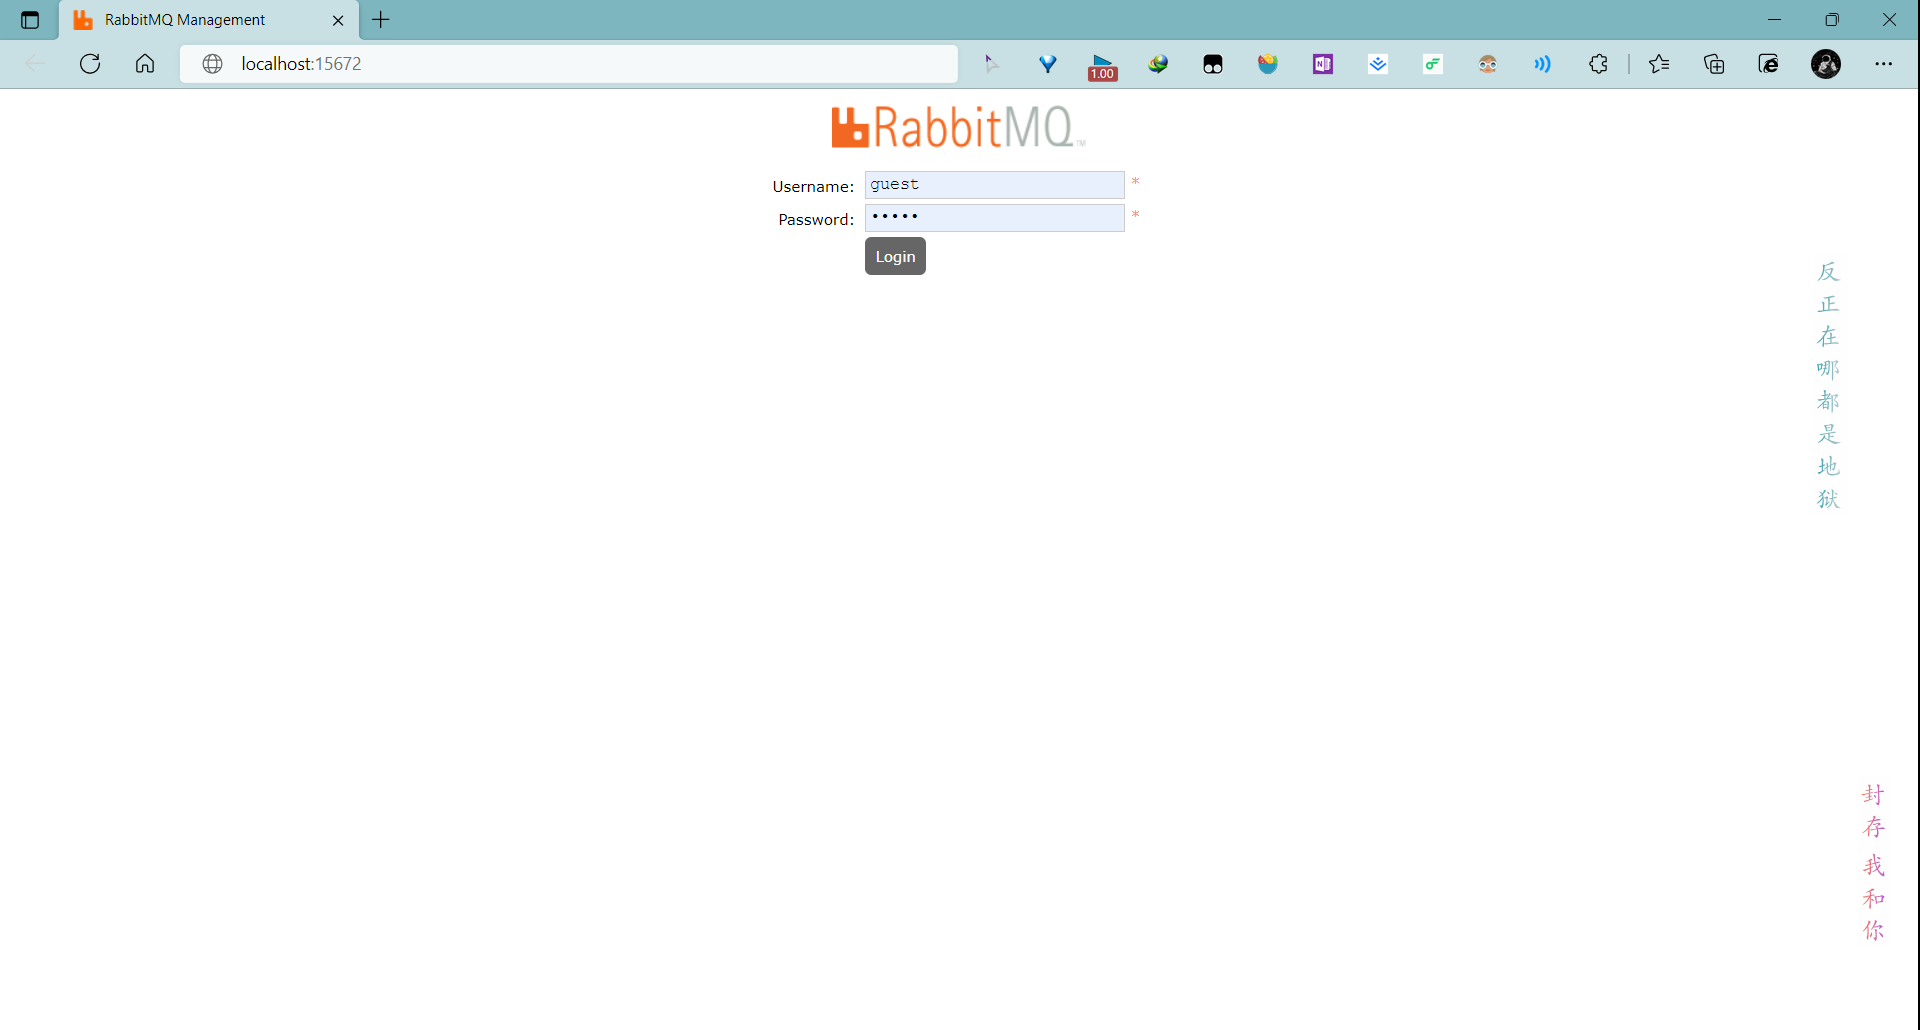
rabbitmq-plugins enable rabbitmq_management完成后双击rabbitmq-server.bat
用户名密码是guest/guest
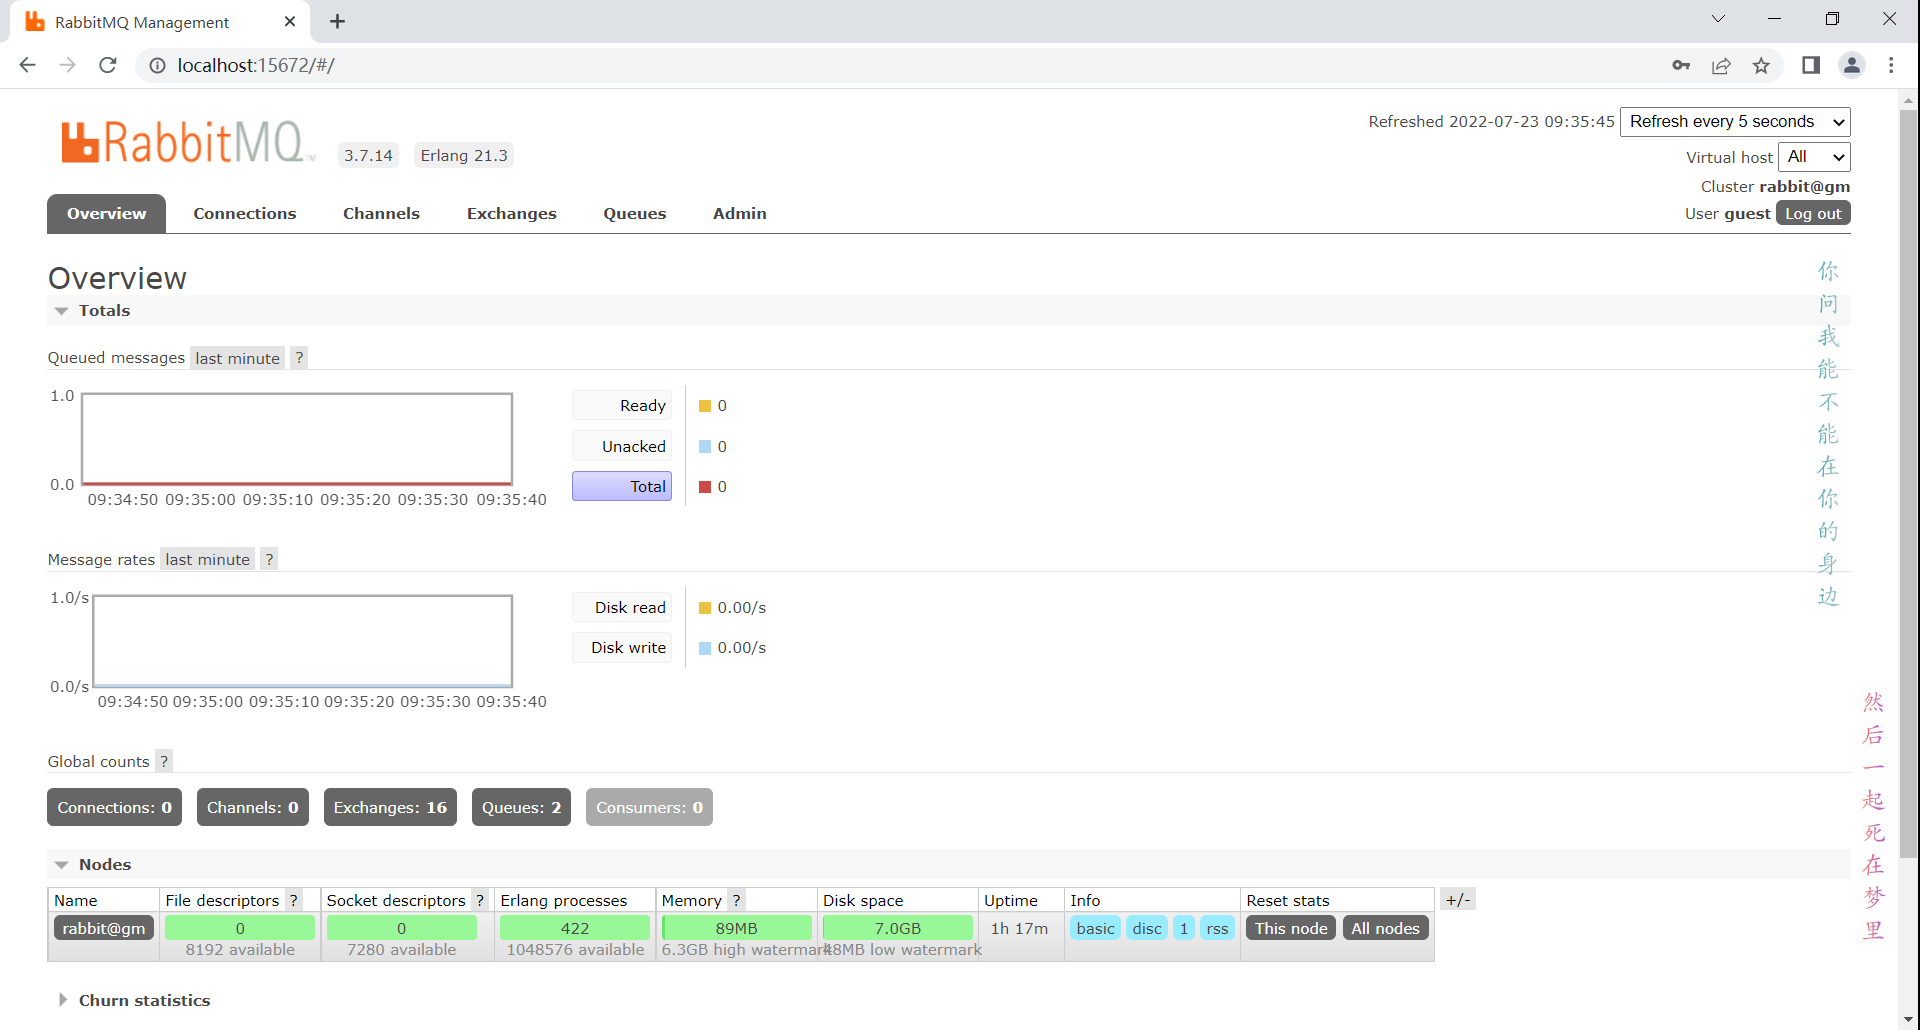
Linux下使用 Docker 安装
直接拉取最新版
docker pull rabbitmq运行容器
docker run -d --name rabbitmq -p 5671:5671 -p 5672:5672 -p 4369:4369 -p 25672:25672 -p 15671:15671 -p 15672:15672 rabbitmq:management进入容器
docker exec -it rabbitmq /bin/bash开启管理插件
rabbitmq-plugins enable rabbitmq_management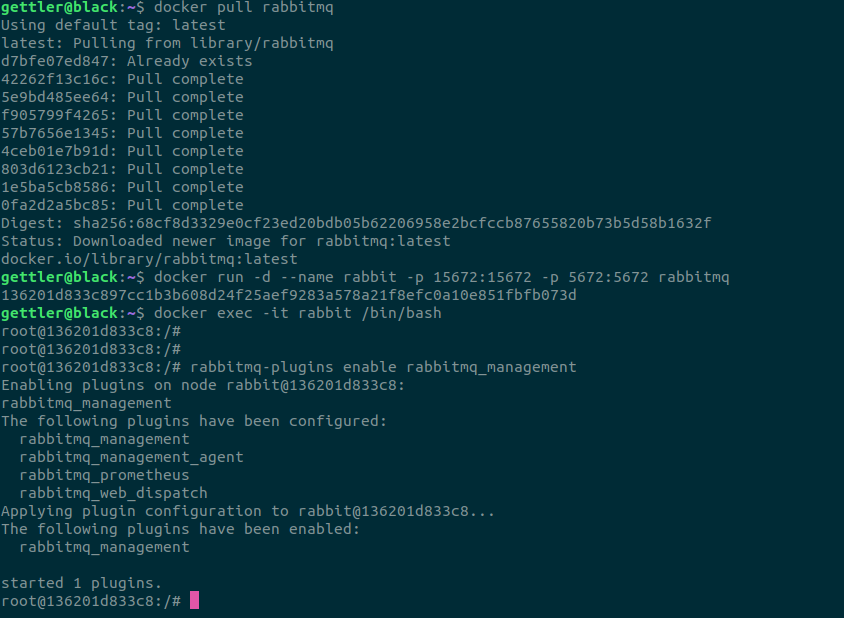
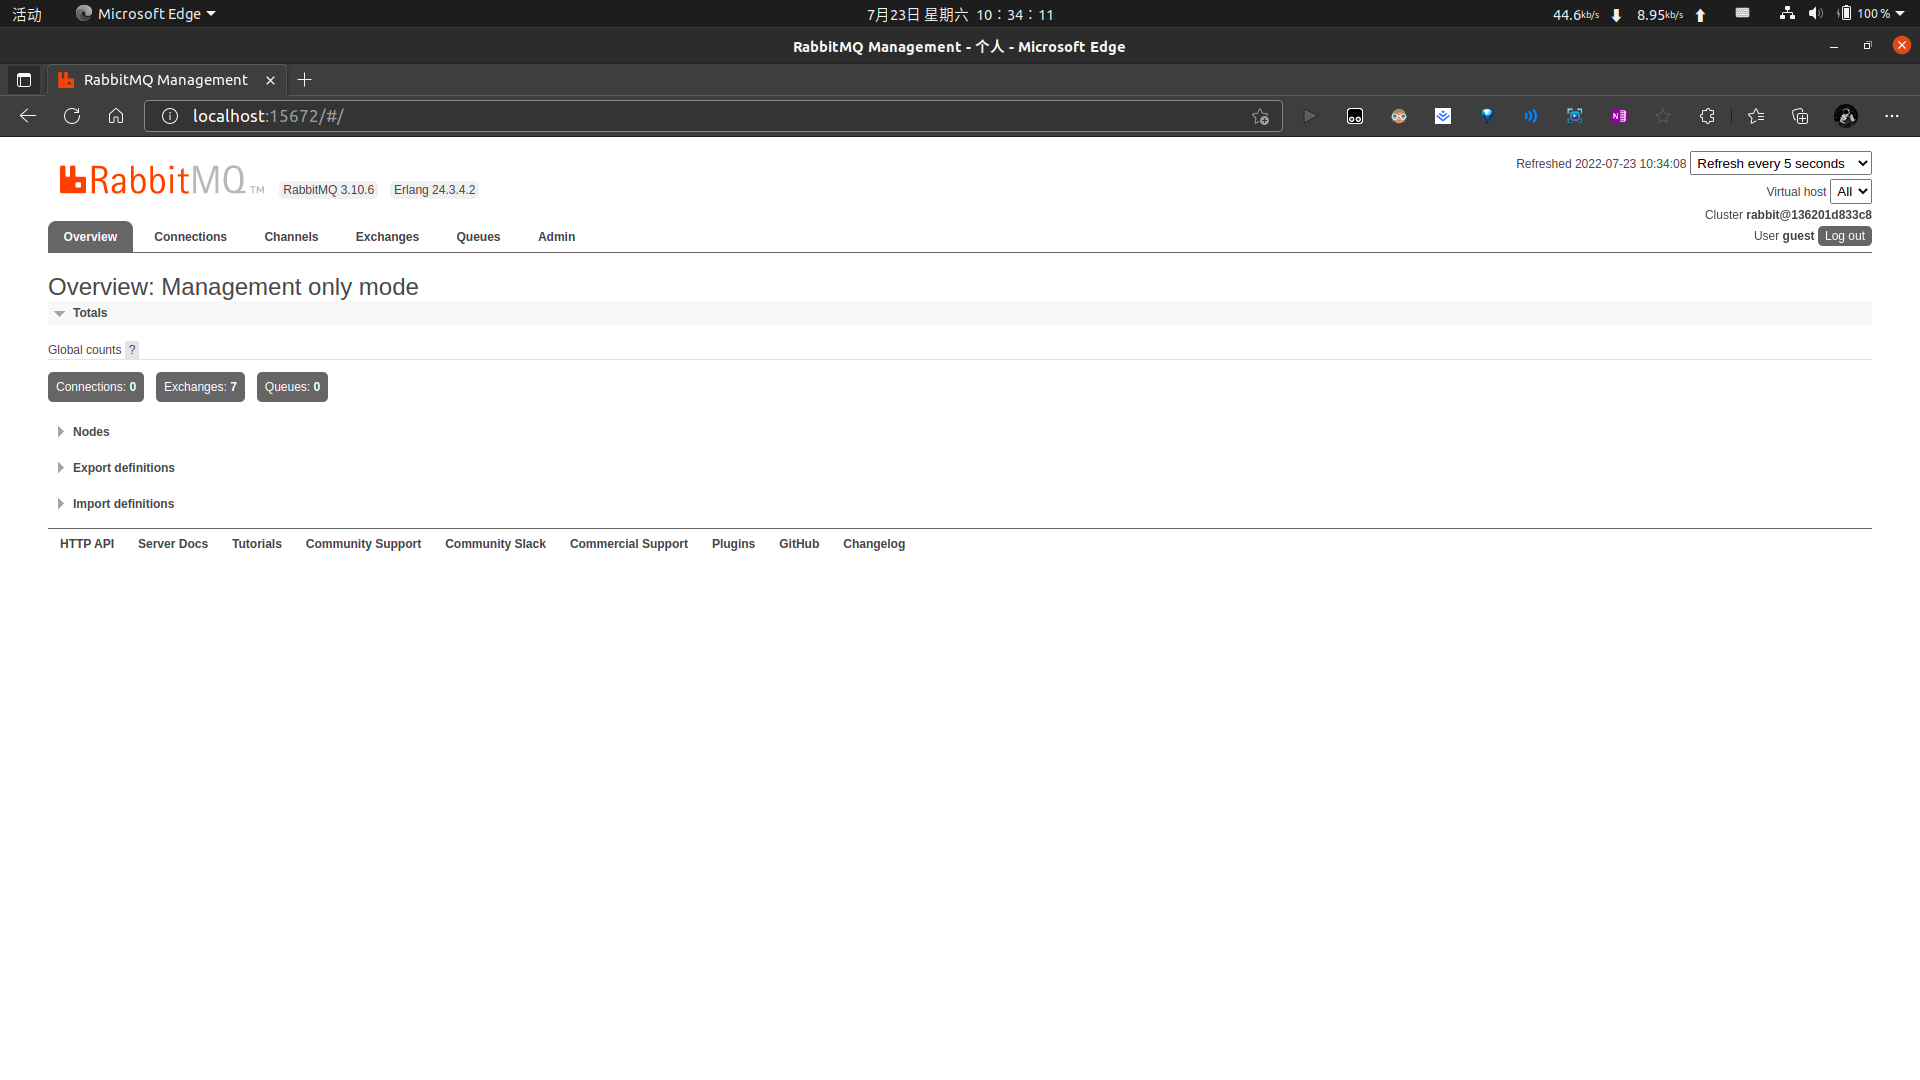
打开管理网站 http://localhost:15672/
4369, 25672 (Erlang发现&集群端口)
5672, 5671 (AMQP端口)
15672 (web管理后台端口)
61613, 61614 (STOMP协议端口)
1883, 8883 (MQTT协议端口)
用户名密码均为 guest
实操
官网例子
简单模式

配置文件 application-easy.yml :
spring:
  rabbitmq:
    host: 123.123.123.123
    port: 5672
    username: Gettler
    password: ********
    virtual-host: /
    queue: easy-queue
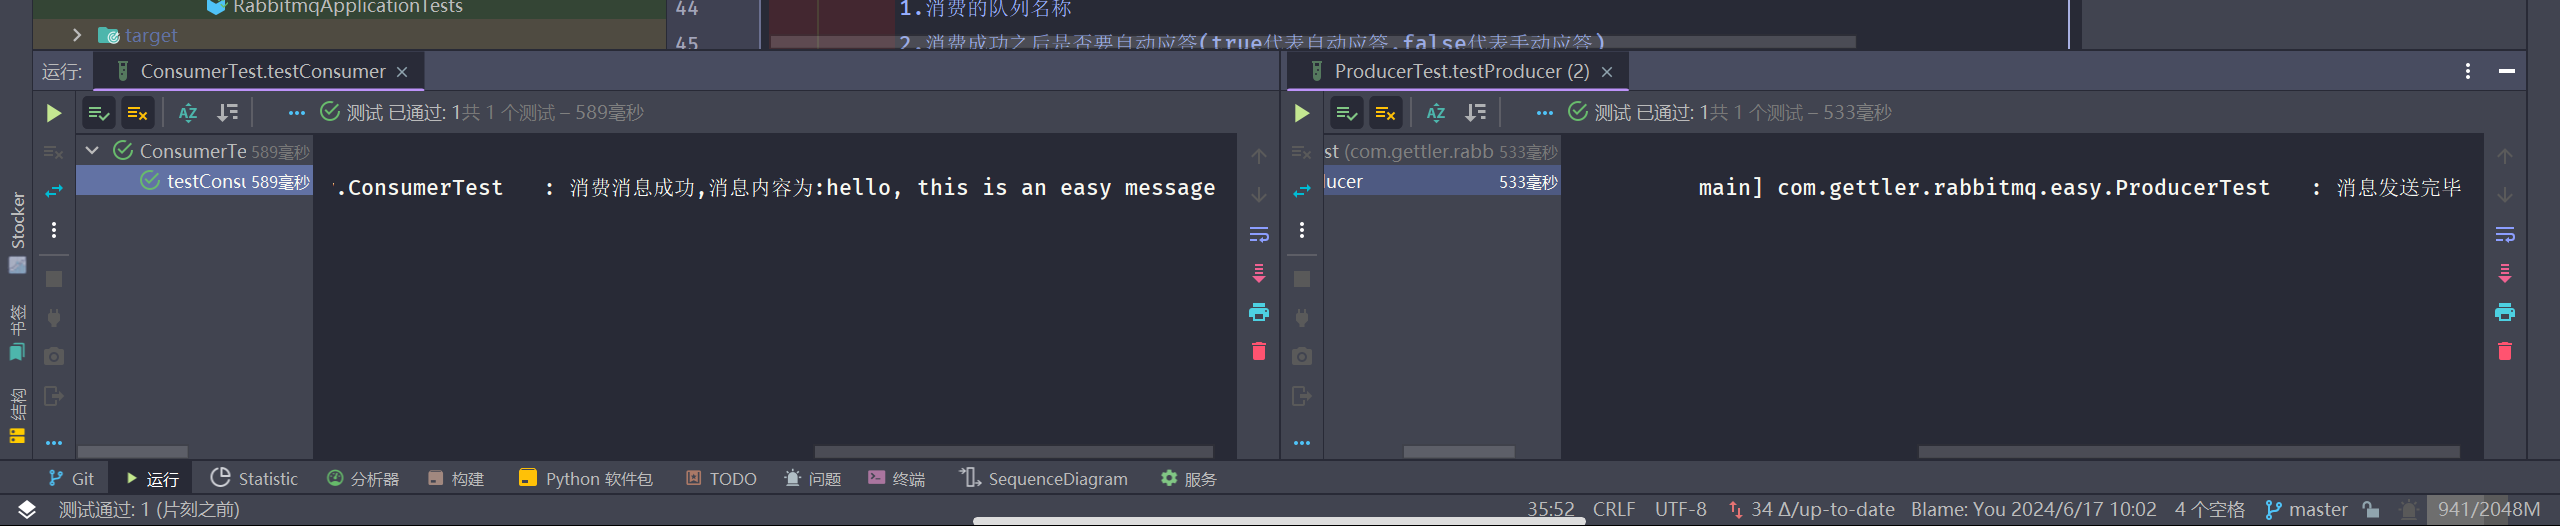
生产者:
package com.gettler.rabbitmq.easy;

import com.gettler.rabbitmq.RabbitmqApplication;
import com.gettler.rabbitmq.config.RabbitMqConnectionFactory;
import com.rabbitmq.client.Channel;
import com.rabbitmq.client.Connection;
import org.junit.Test;
import org.junit.runner.RunWith;
import org.slf4j.Logger;
import org.slf4j.LoggerFactory;
import org.springframework.beans.factory.annotation.Value;
import org.springframework.boot.test.context.SpringBootTest;
import org.springframework.test.context.ActiveProfiles;
import org.springframework.test.context.junit4.SpringRunner;

@ActiveProfiles("easy")
@RunWith(SpringRunner.class)
@SpringBootTest(classes = RabbitmqApplication.class, webEnvironment =
        SpringBootTest.WebEnvironment.RANDOM_PORT)
public class ProducerTest {
    // 队列名称
    @Value("${spring.rabbitmq.queue}")
    public String QUEUE_NAME;
    private static final Logger logger = LoggerFactory.getLogger(ProducerTest.class);

    @Test
    public void testProducer() throws Exception {
        // 创建一个connection
        Connection connection = RabbitMqConnectionFactory.getSingleInstanceConnection();
        // 创建一个channel
        Channel channel = connection.createChannel();
        /*
          创建一个队列
          1.队列名称
          2.队列里面的消息是否持久化(默认为false,代表消息存储在内存中)
          3.该队列是否只供一个消费者进行消费,是否进行共享(true表示可以多个消费者消费)
          4.表示最后一个消费者断开连接以后,该队列是否自动删除(true表示自动删除)
          5.其他参数
         */
        channel.queueDeclare(QUEUE_NAME, false, false, false, null);
        String message = "hello, this is an easy message";
        /*
          发送一个消息
          1.发送到那个交换机(空代表默认交换机)
          2.路由key
          3.其他的参数信息
          4.发送消息的消息体
         */
        channel.basicPublish("", QUEUE_NAME, null, message.getBytes());
        logger.info("消息发送完毕");
    }
}
消费者:
package com.gettler.rabbitmq.easy;

import com.gettler.rabbitmq.RabbitmqApplication;
import com.gettler.rabbitmq.config.RabbitMqConnectionFactory;
import com.rabbitmq.client.CancelCallback;
import com.rabbitmq.client.Channel;
import com.rabbitmq.client.Connection;
import com.rabbitmq.client.DeliverCallback;
import org.junit.Test;
import org.junit.runner.RunWith;
import org.slf4j.Logger;
import org.slf4j.LoggerFactory;
import org.springframework.beans.factory.annotation.Value;
import org.springframework.boot.test.context.SpringBootTest;
import org.springframework.test.context.ActiveProfiles;
import org.springframework.test.context.junit4.SpringRunner;

@ActiveProfiles("easy")
@RunWith(SpringRunner.class)
@SpringBootTest(classes = RabbitmqApplication.class, webEnvironment =
        SpringBootTest.WebEnvironment.RANDOM_PORT)
public class ConsumerTest {
    // 队列名称
    @Value("${spring.rabbitmq.queue}")
    public String QUEUE_NAME;
    private static final Logger logger = LoggerFactory.getLogger(ConsumerTest.class);

    @Test
    public void testConsumer() throws Exception {
        // 创建一个connection
        Connection connection = RabbitMqConnectionFactory.getSingleInstanceConnection();
        // 创建一个channel
        Channel channel = connection.createChannel();
        // 消费消息的回调
        DeliverCallback deliverCallback = (consumerTag, message) -> {
            logger.info("消费消息成功,消息内容为:" + new String(message.getBody()));
        };
        // 取消消费的回调
        CancelCallback cancelCallback = (consumerTag) -> {
            logger.info("消息消费被中断");
        };
        /*
          消费者消费消息
          1.消费的队列名称
          2.消费成功之后是否要自动应答(true代表自动应答,false代表手动应答)
          3.消费者消费消息的回调(函数式接口)
          4.消费者取消消费的回调(函数式接口)
         */
        channel.basicConsume(QUEUE_NAME, true, deliverCallback, cancelCallback);
    }
}
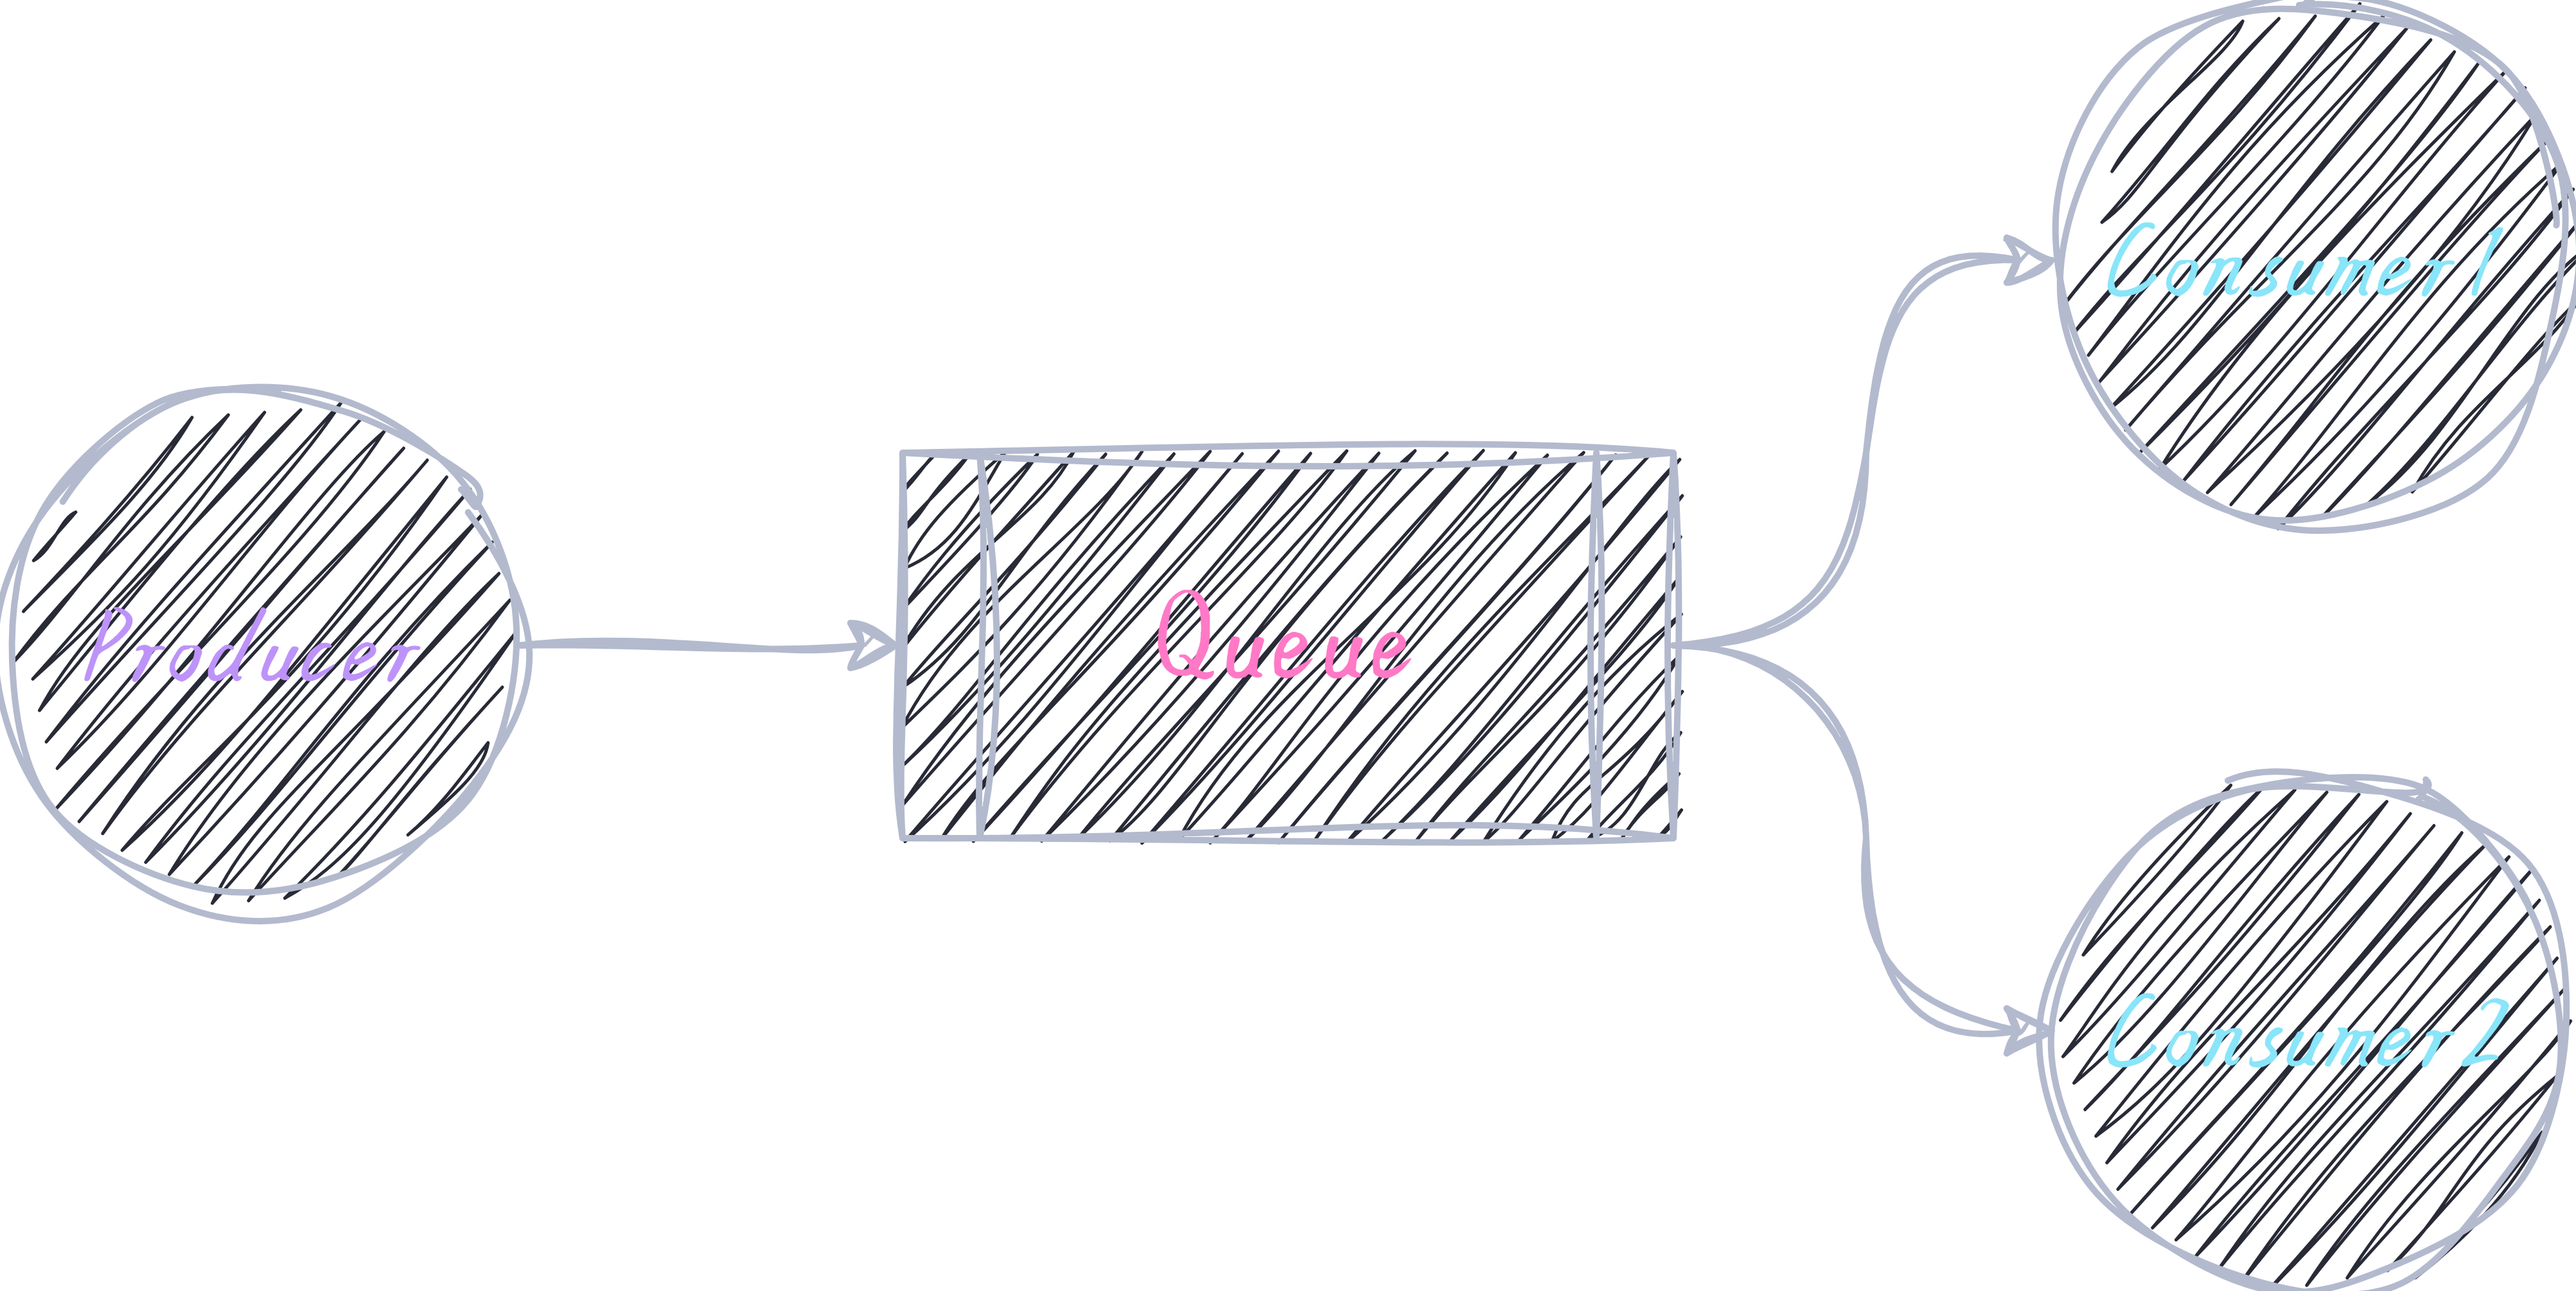
工作模式
配置文件 application-work.yml :
spring:
  rabbitmq:
    host: 123.123.123.123
    port: 5672
    username: Gettler
    password: ********
    virtual-host: /
    queue: work-queue
生产者:
package com.gettler.rabbitmq.work;

import com.gettler.rabbitmq.RabbitmqApplication;
import com.gettler.rabbitmq.config.RabbitMqConnectionFactory;
import com.rabbitmq.client.BuiltinExchangeType;
import com.rabbitmq.client.Channel;
import com.rabbitmq.client.Connection;
import org.junit.Test;
import org.junit.runner.RunWith;
import org.slf4j.Logger;
import org.slf4j.LoggerFactory;
import org.springframework.beans.factory.annotation.Value;
import org.springframework.boot.test.context.SpringBootTest;
import org.springframework.test.context.ActiveProfiles;
import org.springframework.test.context.junit4.SpringRunner;

import java.util.Scanner;

@ActiveProfiles("work")
@RunWith(SpringRunner.class)
@SpringBootTest(classes = RabbitmqApplication.class, webEnvironment =
        SpringBootTest.WebEnvironment.RANDOM_PORT)
public class ProducerTest {
    // 队列名称
    @Value("${spring.rabbitmq.queue}")
    public String QUEUE_NAME;
    private static final Logger logger = LoggerFactory.getLogger(ProducerTest.class);

    @Value("${spring.rabbitmq.host}")
    private String host;

    @Value("${spring.rabbitmq.username}")
    private String username;

    @Value("${spring.rabbitmq.password}")
    private String password;

    @Test
    public void testProducer() throws Exception {
        System.out.println(this.host);
        // 创建一个connection
        Connection connection = RabbitMqConnectionFactory.getSingleInstanceConnection();
        // 创建一个channel
        Channel channel = connection.createChannel();
        // 声明交换机
        channel.exchangeDeclare("fanout", BuiltinExchangeType.FANOUT);
        /*
          创建一个队列
          1.队列名称
          2.队列里面的消息是否持久化(默认为false,代表消息存储在内存中)
          3.该队列是否只供一个消费者进行消费,是否进行共享(true表示可以多个消费者消费)
          4.表示最后一个消费者断开连接以后,该队列是否自动删除(true表示自动删除)
          5.其他参数
         */
        channel.queueDeclare(QUEUE_NAME, false, false, false, null);
        Scanner scanner = new Scanner(System.in);
        while (scanner.hasNext()) {
            String message = scanner.next();
            /*
              发送一个消息
              1.发送到那个交换机(空代表默认交换机)
              2.路由key
              3.其他的参数信息
              4.发送消息的消息体
             */
            channel.basicPublish("", QUEUE_NAME, null, message.getBytes());
            logger.info("消息发送完毕");
        }
    }
}
消费者A:
package com.gettler.rabbitmq.work;

import com.gettler.rabbitmq.RabbitmqApplication;
import com.gettler.rabbitmq.config.RabbitMqConnectionFactory;
import com.rabbitmq.client.CancelCallback;
import com.rabbitmq.client.Channel;
import com.rabbitmq.client.Connection;
import com.rabbitmq.client.DeliverCallback;
import org.junit.Test;
import org.junit.runner.RunWith;
import org.slf4j.Logger;
import org.slf4j.LoggerFactory;
import org.springframework.beans.factory.annotation.Value;
import org.springframework.boot.test.context.SpringBootTest;
import org.springframework.test.context.ActiveProfiles;
import org.springframework.test.context.junit4.SpringRunner;

@ActiveProfiles("work")
@RunWith(SpringRunner.class)
@SpringBootTest(classes = RabbitmqApplication.class, webEnvironment =
        SpringBootTest.WebEnvironment.RANDOM_PORT)
public class ConsumerATest {
    // 队列名称
    @Value("${spring.rabbitmq.queue}")
    public String QUEUE_NAME;
    private static final Logger logger = LoggerFactory.getLogger(ConsumerATest.class);

    @Test
    public void testConsumerA() throws Exception {
        // 创建一个connection
        Connection connection = RabbitMqConnectionFactory.getSingleInstanceConnection();
        // 创建一个channel
        Channel channel = connection.createChannel();
        // 消费消息的回调
        DeliverCallback deliverCallback = (consumerTag, message) -> {
            logger.info("消费消息成功,消息内容为:" + new String(message.getBody()));
        };
        // 取消消费的回调
        CancelCallback cancelCallback = (consumerTag) -> {
            logger.info("消息消费被中断");
        };
        /*
          消费者消费消息
          1.消费的队列名称
          2.消费成功之后是否要自动应答(true代表自动应答,false代表手动应答)
          3.消费者消费消息的回调(函数式接口)
          4.消费者取消消费的回调(函数式接口)
         */
        channel.basicConsume(QUEUE_NAME, true, deliverCallback, cancelCallback);
    }
}
消费者B:
package com.gettler.rabbitmq.work;

import com.gettler.rabbitmq.RabbitmqApplication;
import com.gettler.rabbitmq.config.RabbitMqConnectionFactory;
import com.rabbitmq.client.CancelCallback;
import com.rabbitmq.client.Channel;
import com.rabbitmq.client.Connection;
import com.rabbitmq.client.DeliverCallback;
import org.junit.Test;
import org.junit.runner.RunWith;
import org.slf4j.Logger;
import org.slf4j.LoggerFactory;
import org.springframework.beans.factory.annotation.Value;
import org.springframework.boot.test.context.SpringBootTest;
import org.springframework.test.context.ActiveProfiles;
import org.springframework.test.context.junit4.SpringRunner;

@ActiveProfiles("work")
@RunWith(SpringRunner.class)
@SpringBootTest(classes = RabbitmqApplication.class, webEnvironment =
        SpringBootTest.WebEnvironment.RANDOM_PORT)
public class ConsumerBTest {
    // 队列名称
    @Value("${spring.rabbitmq.queue}")
    public String QUEUE_NAME;
    private static final Logger logger = LoggerFactory.getLogger(ConsumerBTest.class);

    @Test
    public void testConsumerB() throws Exception {
        // 创建一个connection
        Connection connection = RabbitMqConnectionFactory.getSingleInstanceConnection();
        // 创建一个channel
        Channel channel = connection.createChannel();
        // 消费消息的回调
        DeliverCallback deliverCallback = (consumerTag, message) -> {
            logger.info("消费消息成功,消息内容为:" + new String(message.getBody()));
        };
        // 取消消费的回调
        CancelCallback cancelCallback = (consumerTag) -> {
            logger.info("消息消费被中断");
        };
        /*
          消费者消费消息
          1.消费的队列名称
          2.消费成功之后是否要自动应答(true代表自动应答,false代表手动应答)
          3.消费者消费消息的回调(函数式接口)
          4.消费者取消消费的回调(函数式接口)
         */
        channel.basicConsume(QUEUE_NAME, true, deliverCallback, cancelCallback);
    }
}
路由模式

配置文件 application-direct.yml :
spring:
  rabbitmq:
    host: 123.123.123.123
    port: 5672
    username: Gettler
    password: ********
    virtual-host: /
生产者:
package com.gettler.rabbitmq.direct;

import com.gettler.rabbitmq.RabbitmqApplication;
import com.gettler.rabbitmq.config.RabbitMqConnectionFactory;
import com.rabbitmq.client.BuiltinExchangeType;
import com.rabbitmq.client.Channel;
import com.rabbitmq.client.Connection;
import org.junit.Test;
import org.junit.runner.RunWith;
import org.slf4j.Logger;
import org.slf4j.LoggerFactory;
import org.springframework.boot.test.context.SpringBootTest;
import org.springframework.test.context.ActiveProfiles;
import org.springframework.test.context.junit4.SpringRunner;

import java.util.HashMap;
import java.util.Map;

@ActiveProfiles("direct")
@RunWith(SpringRunner.class)
@SpringBootTest(classes = RabbitmqApplication.class, webEnvironment =
        SpringBootTest.WebEnvironment.RANDOM_PORT)
public class ProducerTest {
    private static final Logger logger = LoggerFactory.getLogger(ProducerTest.class);


    @Test
    public void testProducer() throws Exception {
        // 创建channel
        Connection connection = RabbitMqConnectionFactory.getSingleInstanceConnection();
        Channel channel = connection.createChannel();
        // 声明交换机
        channel.exchangeDeclare("direct", BuiltinExchangeType.DIRECT);
        Map<String, String> messageMap = new HashMap<>();
        messageMap.put("info", "普通 info 信息");
        messageMap.put("warning", "警告 warning 信息");
        messageMap.put("error", "错误 error 信息");
        messageMap.put("debug", "调试 debug 信息");
        for (Map.Entry<String, String> mes : messageMap.entrySet()) {
            String routingKey = mes.getKey();
            String message = mes.getValue();
            channel.basicPublish("direct", routingKey, null, message.getBytes());
            logger.info("消息发送完毕");
        }
    }
}
消费者A:
package com.gettler.rabbitmq.direct;

import com.gettler.rabbitmq.RabbitmqApplication;
import com.gettler.rabbitmq.config.RabbitMqConnectionFactory;
import com.rabbitmq.client.*;
import org.junit.Test;
import org.junit.runner.RunWith;
import org.slf4j.Logger;
import org.slf4j.LoggerFactory;
import org.springframework.boot.test.context.SpringBootTest;
import org.springframework.test.context.ActiveProfiles;
import org.springframework.test.context.junit4.SpringRunner;

@ActiveProfiles("direct")
@RunWith(SpringRunner.class)
@SpringBootTest(classes = RabbitmqApplication.class, webEnvironment =
        SpringBootTest.WebEnvironment.RANDOM_PORT)
public class ConsumerATest {
    private static final Logger logger = LoggerFactory.getLogger(ConsumerATest.class);

    @Test
    public void testConsumerA() throws Exception {
        // 创建一个connection
        Connection connection = RabbitMqConnectionFactory.getSingleInstanceConnection();
        // 创建一个channel
        Channel channel = connection.createChannel();
        // 创建channel
        // 声明交换机
        channel.exchangeDeclare("direct", BuiltinExchangeType.DIRECT);
        // 声明临时队列
        channel.queueDeclare("console", false, false, false, null);
        // 绑定队列与交换机
        channel.queueBind("console", "direct", "info");
        channel.queueBind("console", "direct", "warning");
        // 消费消息
        DeliverCallback deliverCallback = (consumerTag, message) -> {
            logger.info("获得消息:" + new String(message.getBody()));
        };
        CancelCallback cancelCallback = (consumerTag) -> {
            logger.info("消息消费被中断");
        };
        channel.basicConsume("console", true, deliverCallback, cancelCallback);
    }
}
消费者B:
package com.gettler.rabbitmq.direct;

import com.gettler.rabbitmq.RabbitmqApplication;
import com.gettler.rabbitmq.config.RabbitMqConnectionFactory;
import com.rabbitmq.client.*;
import org.junit.Test;
import org.junit.runner.RunWith;
import org.slf4j.Logger;
import org.slf4j.LoggerFactory;
import org.springframework.boot.test.context.SpringBootTest;
import org.springframework.test.context.ActiveProfiles;
import org.springframework.test.context.junit4.SpringRunner;

@ActiveProfiles("direct")
@RunWith(SpringRunner.class)
@SpringBootTest(classes = RabbitmqApplication.class, webEnvironment =
        SpringBootTest.WebEnvironment.RANDOM_PORT)
public class ConsumerBTest {
    private static final Logger logger = LoggerFactory.getLogger(ConsumerBTest.class);

    @Test
    public void testConsumerB() throws Exception {
        // 创建一个connection
        Connection connection = RabbitMqConnectionFactory.getSingleInstanceConnection();
        // 创建一个channel
        Channel channel = connection.createChannel();
        // 声明交换机
        channel.exchangeDeclare("direct", BuiltinExchangeType.DIRECT);
        // 声明临时队列
        channel.queueDeclare("disk", false, false, false, null);
        // 绑定队列与交换机
        channel.queueBind("disk", "direct", "error");
        // 消费消息
        DeliverCallback deliverCallback = (consumerTag, message) -> {
            logger.info("获得消息:" + new String(message.getBody()));
        };
        CancelCallback cancelCallback = (consumerTag) -> {
            logger.info("消息消费被中断");
        };
        channel.basicConsume("disk", true, deliverCallback, cancelCallback);
    }
}
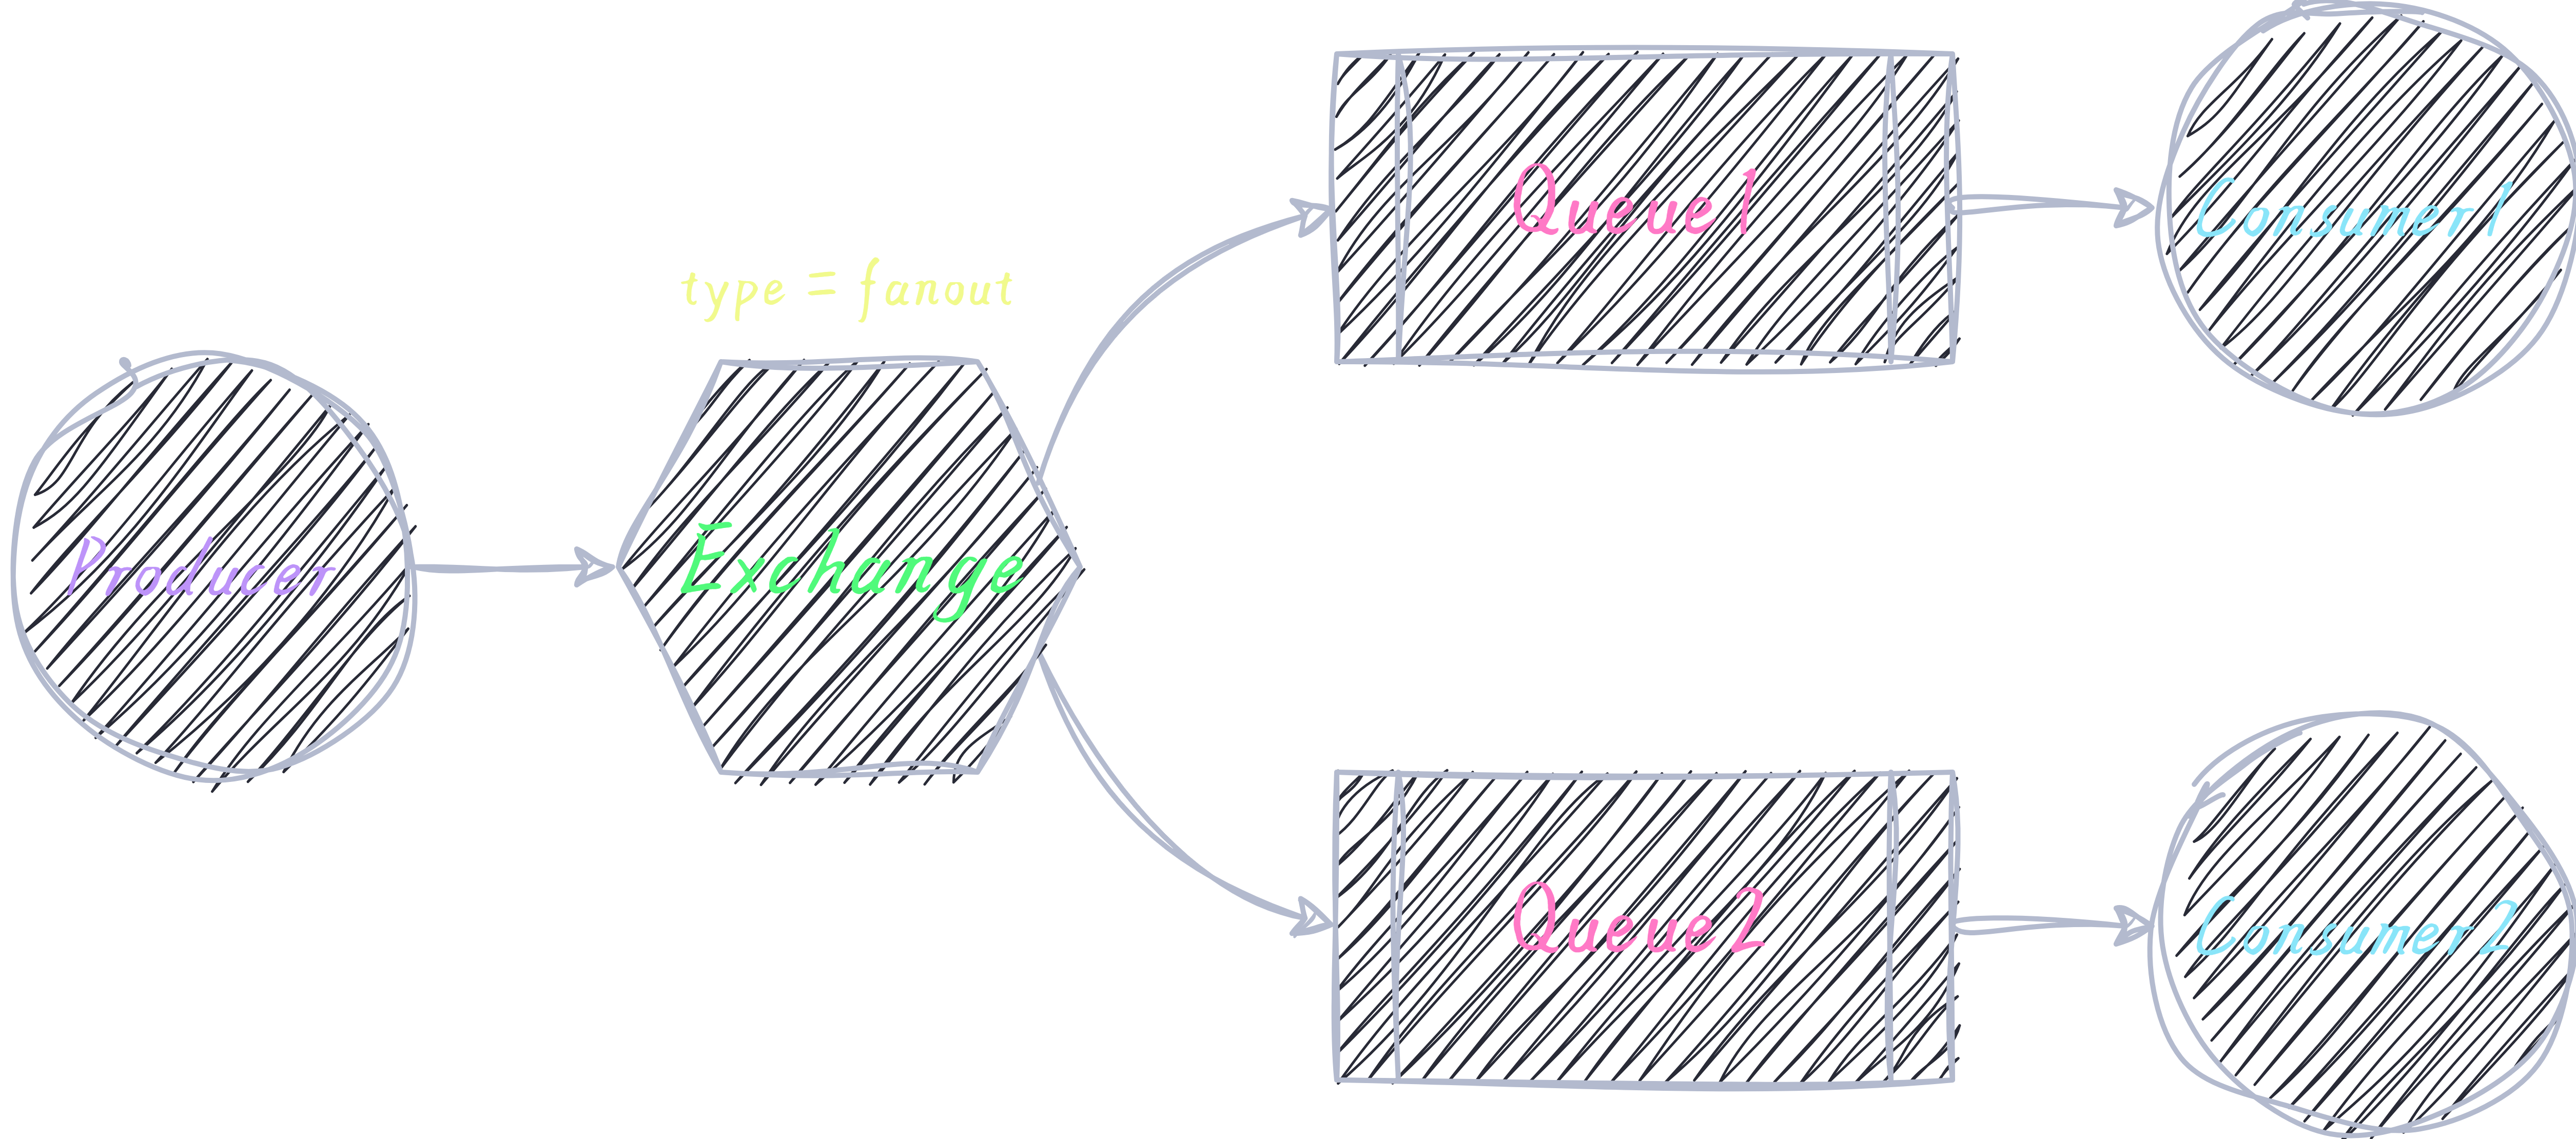
广播模式
配置文件 application-fanout.yml :
spring:
  rabbitmq:
    host: 123.123.123.123
    port: 5672
    username: Gettler
    password: ********
    virtual-host: /
生产者:
package com.gettler.rabbitmq.fanout;

import com.gettler.rabbitmq.RabbitmqApplication;
import com.gettler.rabbitmq.config.RabbitMqConnectionFactory;
import com.rabbitmq.client.BuiltinExchangeType;
import com.rabbitmq.client.Channel;
import com.rabbitmq.client.Connection;
import org.junit.Test;
import org.junit.runner.RunWith;
import org.slf4j.Logger;
import org.slf4j.LoggerFactory;
import org.springframework.boot.test.context.SpringBootTest;
import org.springframework.test.context.ActiveProfiles;
import org.springframework.test.context.junit4.SpringRunner;

@ActiveProfiles("fanout")
@RunWith(SpringRunner.class)
@SpringBootTest(classes = RabbitmqApplication.class, webEnvironment =
        SpringBootTest.WebEnvironment.RANDOM_PORT)
public class ProducerTest {
    private static final Logger logger = LoggerFactory.getLogger(ProducerTest.class);

    @Test
    public void testProducer() throws Exception {
        // 创建channel
        Connection connection = RabbitMqConnectionFactory.getSingleInstanceConnection();
        Channel channel = connection.createChannel();
        // 声明交换机
        channel.exchangeDeclare("fanout", BuiltinExchangeType.FANOUT);
        // 发送10条消息
        for (int i = 0; i < 10; i++) {
            String message = i + "";
            channel.basicPublish("fanout", "", null, message.getBytes());
            logger.info("消息发送完毕" + message);
        }
    }
}
消费者A:
package com.gettler.rabbitmq.fanout;

import com.gettler.rabbitmq.RabbitmqApplication;
import com.gettler.rabbitmq.config.RabbitMqConnectionFactory;
import com.rabbitmq.client.*;
import org.junit.Test;
import org.junit.runner.RunWith;
import org.slf4j.Logger;
import org.slf4j.LoggerFactory;
import org.springframework.boot.test.context.SpringBootTest;
import org.springframework.test.context.ActiveProfiles;
import org.springframework.test.context.junit4.SpringRunner;

@ActiveProfiles("fanout")
@RunWith(SpringRunner.class)
@SpringBootTest(classes = RabbitmqApplication.class, webEnvironment =
        SpringBootTest.WebEnvironment.RANDOM_PORT)
public class ConsumerATest {
    private static final Logger logger = LoggerFactory.getLogger(ConsumerATest.class);

    @Test
    public void testConsumerA() throws Exception {
        // 创建一个connection
        Connection connection = RabbitMqConnectionFactory.getSingleInstanceConnection();
        // 创建一个channel
        Channel channel = connection.createChannel();
        // 声明交换机
        channel.exchangeDeclare("fanout", BuiltinExchangeType.FANOUT);
        // 声明临时队列
        String queueName = channel.queueDeclare().getQueue();
        // 绑定队列与交换机
        channel.queueBind(queueName, "fanout", "");
        // 消费消息
        DeliverCallback deliverCallback = (consumerTag, message) -> {
            logger.info("获得消息:" + new String(message.getBody()));
        };
        CancelCallback cancelCallback = (consumerTag) -> {
            logger.info("消息消费被中断");
        };
        channel.basicConsume(queueName, true, deliverCallback, cancelCallback);
    }
}
消费者B:
package com.gettler.rabbitmq.fanout;

import com.gettler.rabbitmq.RabbitmqApplication;
import com.gettler.rabbitmq.config.RabbitMqConnectionFactory;
import com.rabbitmq.client.*;
import org.junit.Test;
import org.junit.runner.RunWith;
import org.slf4j.Logger;
import org.slf4j.LoggerFactory;
import org.springframework.boot.test.context.SpringBootTest;
import org.springframework.test.context.ActiveProfiles;
import org.springframework.test.context.junit4.SpringRunner;

@ActiveProfiles("fanout")
@RunWith(SpringRunner.class)
@SpringBootTest(classes = RabbitmqApplication.class, webEnvironment =
        SpringBootTest.WebEnvironment.RANDOM_PORT)
public class ConsumerBTest {
    private static final Logger logger = LoggerFactory.getLogger(ConsumerBTest.class);

    @Test
    public void testConsumerB() throws Exception {
        // 创建一个connection
        Connection connection = RabbitMqConnectionFactory.getSingleInstanceConnection();
        // 创建一个channel
        Channel channel = connection.createChannel();
        // 声明交换机
        channel.exchangeDeclare("fanout", BuiltinExchangeType.FANOUT);
        // 声明临时队列
        String queueName = channel.queueDeclare().getQueue();
        // 绑定队列与交换机
        channel.queueBind(queueName, "fanout", "");
        // 消费消息
        DeliverCallback deliverCallback = (consumerTag, message) -> {
            logger.info("获得消息:" + new String(message.getBody()));
        };
        CancelCallback cancelCallback = (consumerTag) -> {
            logger.info("消息消费被中断");
        };
        channel.basicConsume(queueName, true, deliverCallback, cancelCallback);
    }
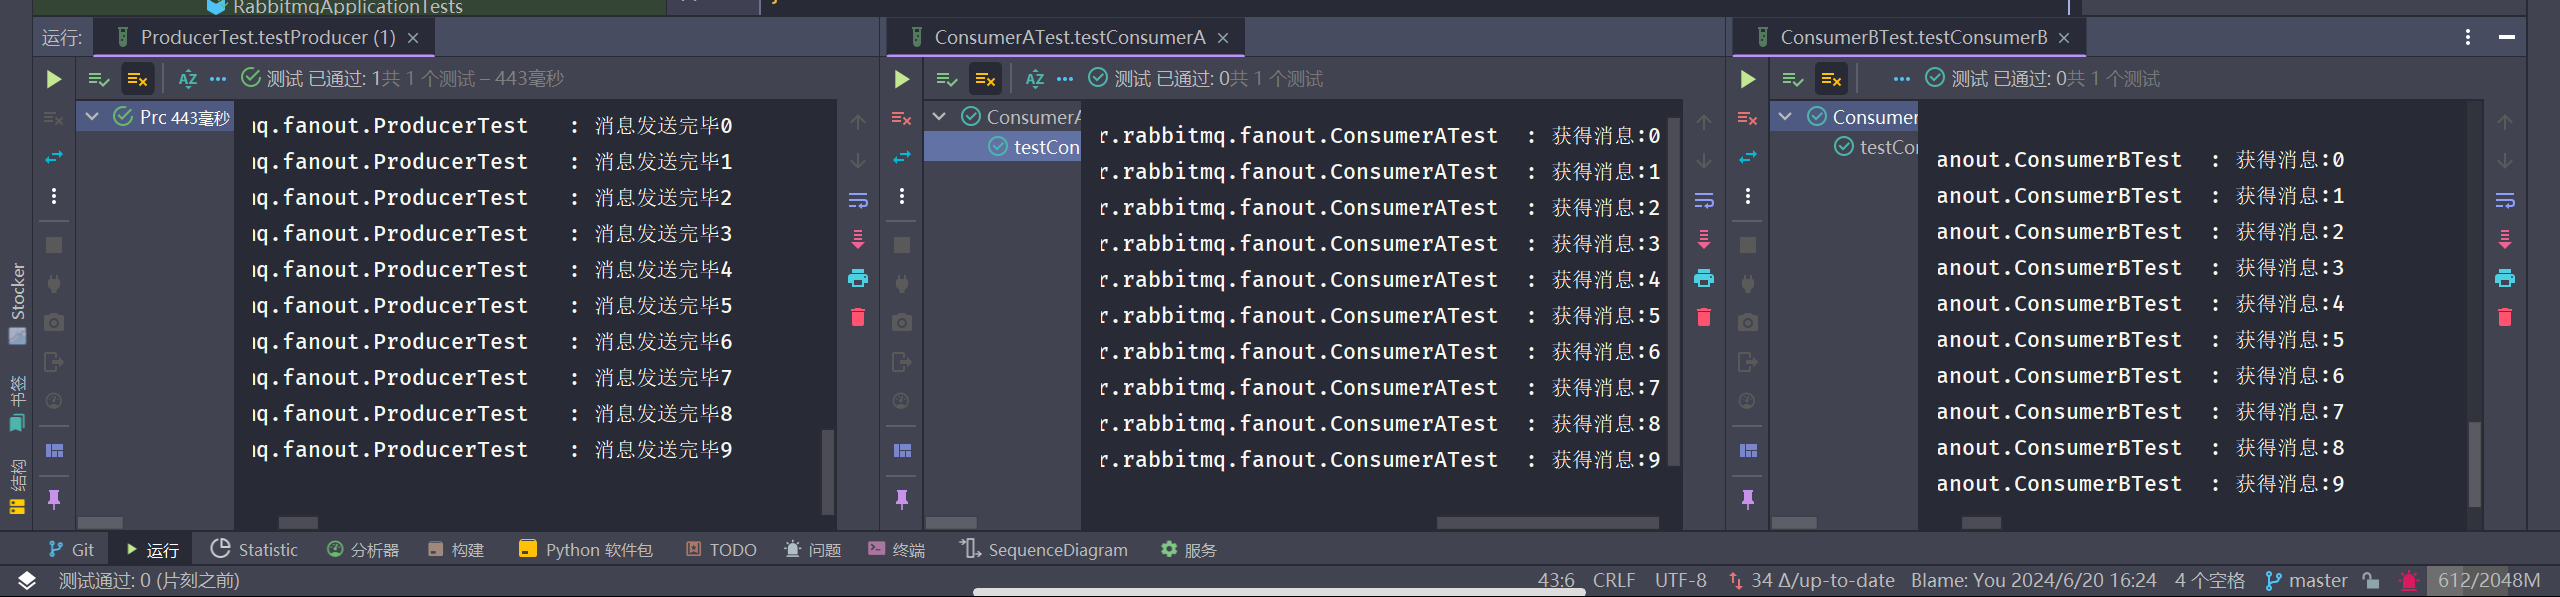
}
主题模式
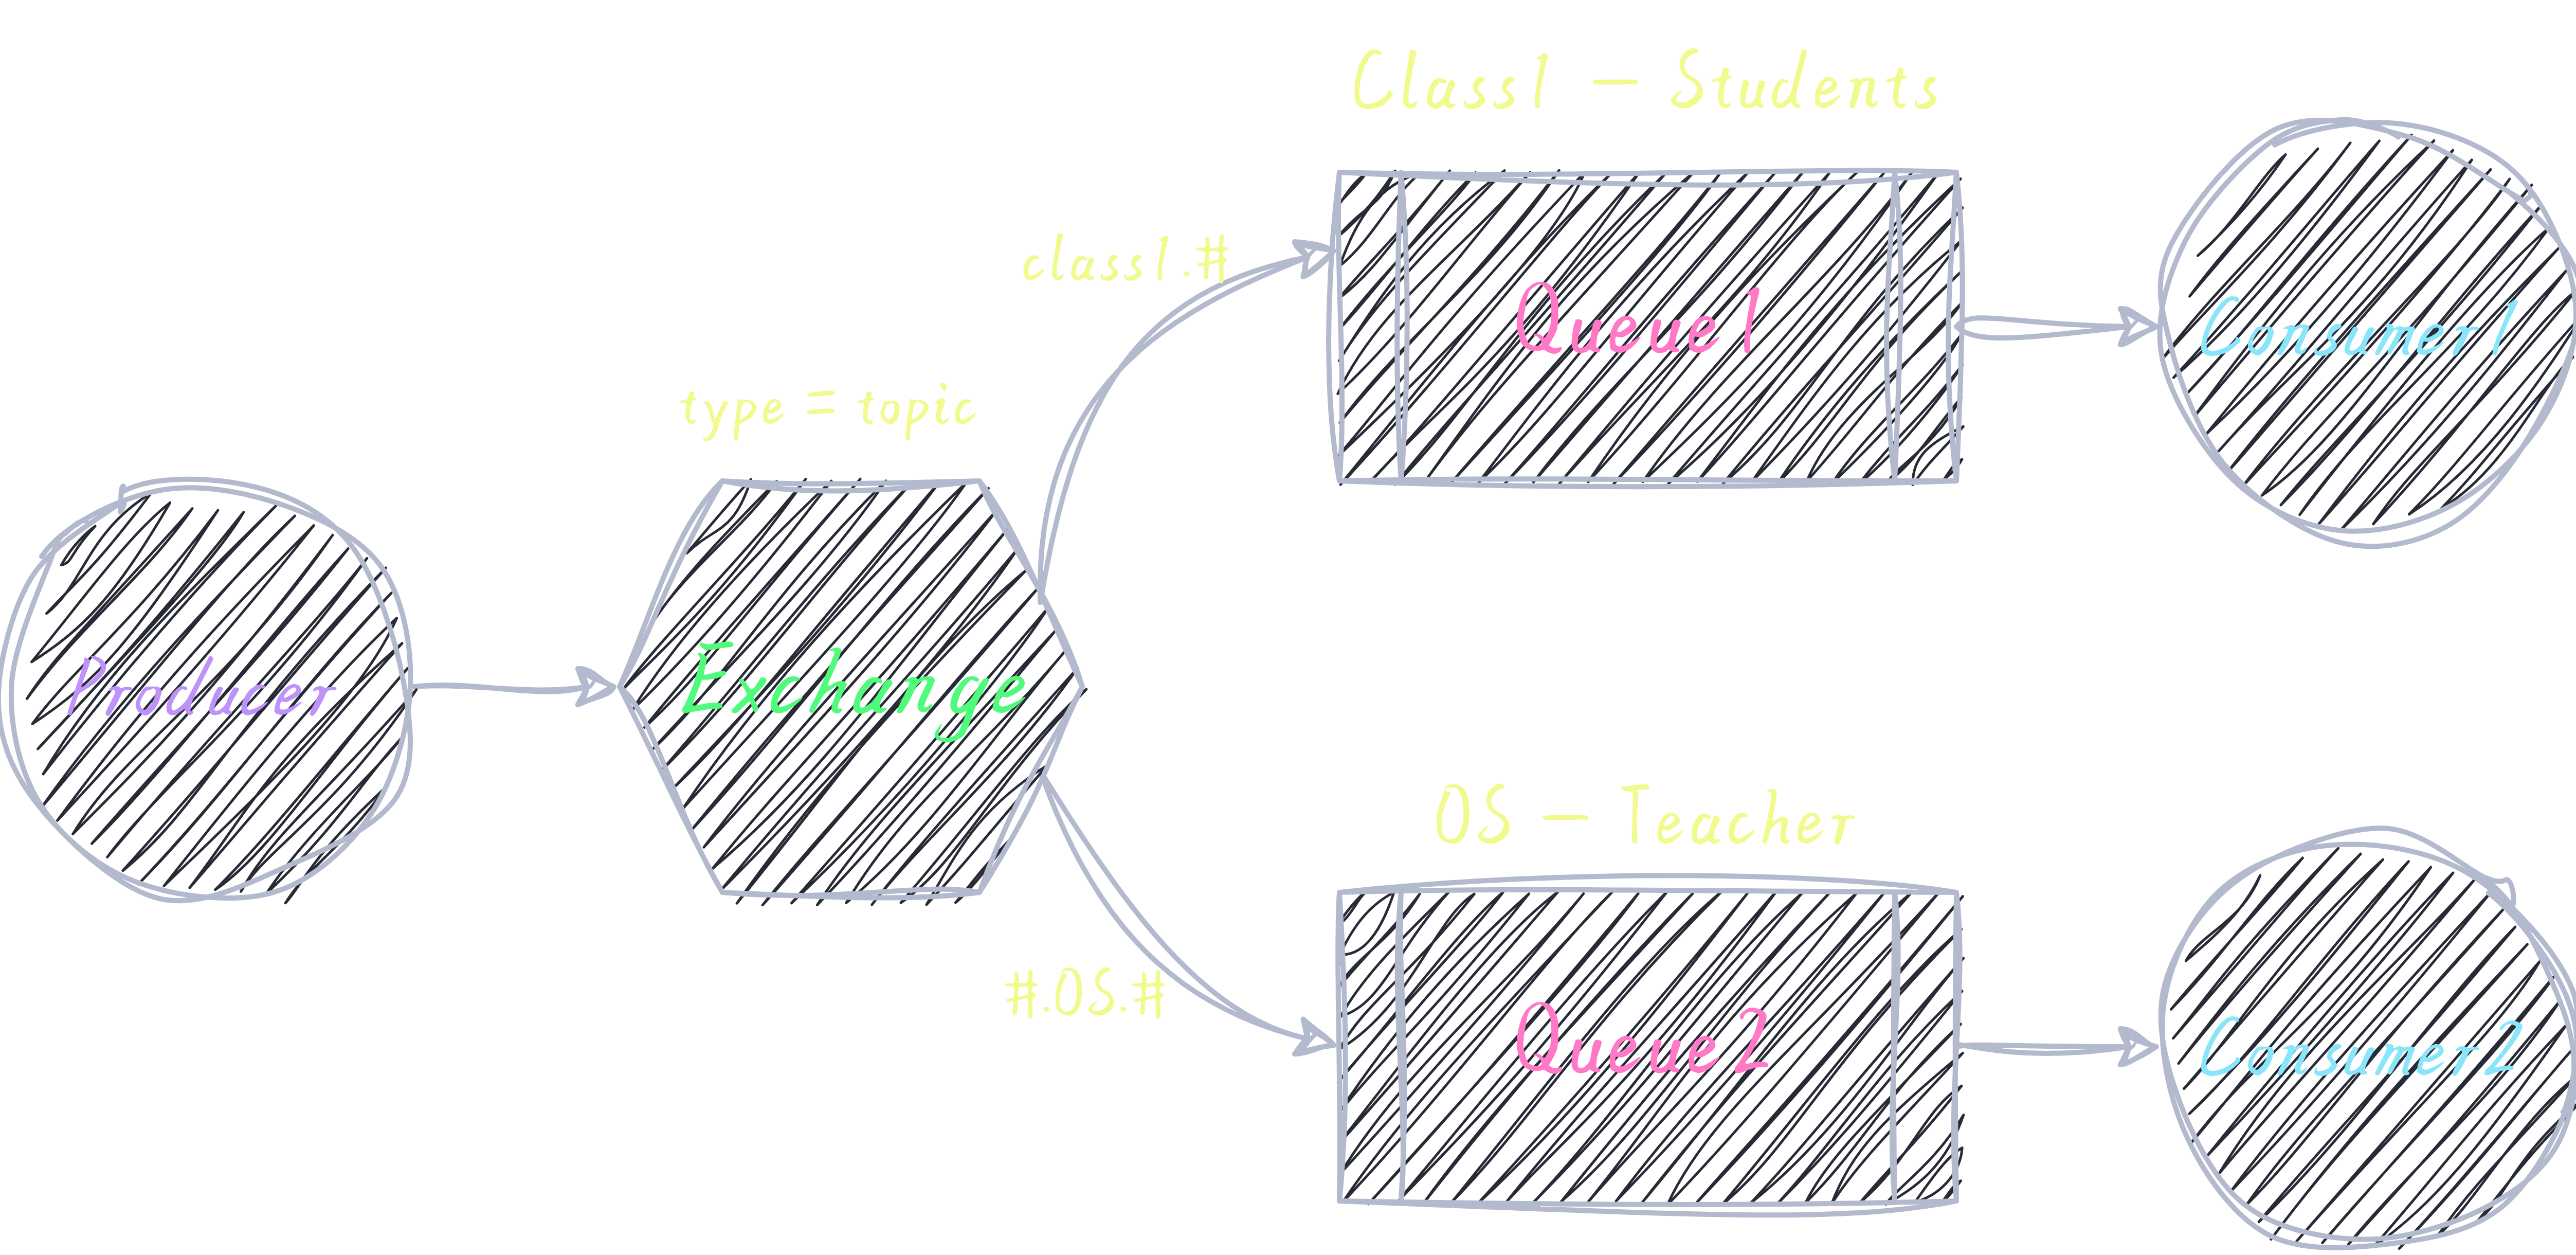
配置文件 application-topic.yml :
spring:
  rabbitmq:
    host: 123.123.123.123
    port: 5672
    username: Gettler
    password: ********
    virtual-host: /
生产者:
package com.gettler.rabbitmq.topic;

import com.gettler.rabbitmq.RabbitmqApplication;
import com.gettler.rabbitmq.config.RabbitMqConnectionFactory;
import com.rabbitmq.client.BuiltinExchangeType;
import com.rabbitmq.client.Channel;
import com.rabbitmq.client.Connection;
import org.junit.Test;
import org.junit.runner.RunWith;
import org.slf4j.Logger;
import org.slf4j.LoggerFactory;
import org.springframework.boot.test.context.SpringBootTest;
import org.springframework.test.context.ActiveProfiles;
import org.springframework.test.context.junit4.SpringRunner;

import java.util.HashMap;
import java.util.Map;

/**
 * @author Gettler
 * @date 2024/06/13
 */
@ActiveProfiles("topic")
@RunWith(SpringRunner.class)
@SpringBootTest(classes = RabbitmqApplication.class, webEnvironment =
        SpringBootTest.WebEnvironment.RANDOM_PORT)
public class ProducerTest {
    private static final Logger logger = LoggerFactory.getLogger(ProducerTest.class);

    @Test
    public void testProducer() throws Exception {
        // 创建channel
        Connection connection = RabbitMqConnectionFactory.getSingleInstanceConnection();
        Channel channel = connection.createChannel();
        // 声明交换机
        channel.exchangeDeclare("topic", BuiltinExchangeType.TOPIC);
        Map<String, String> messageMap = new HashMap<>();
        messageMap.put("class1.DB.exam", "一班数据库考试通知");
        messageMap.put("class1.OS.exam", "一班操作系统考试通知");
        messageMap.put("class2.DB.exam", "二班数据库考试通知");
        messageMap.put("class2.OS.exam", "二班操作系统考试通知");
        for (Map.Entry<String, String> mes : messageMap.entrySet()) {
            String routingKey = mes.getKey();
            String message = mes.getValue();
            channel.basicPublish("topic", routingKey, null, message.getBytes());
            logger.info("消息发送完毕");
        }
    }
}
消费者A(模拟一班的学生):
package com.gettler.rabbitmq.topic;

import com.gettler.rabbitmq.RabbitmqApplication;
import com.gettler.rabbitmq.config.RabbitMqConnectionFactory;
import com.rabbitmq.client.*;
import org.junit.Test;
import org.junit.runner.RunWith;
import org.slf4j.Logger;
import org.slf4j.LoggerFactory;
import org.springframework.boot.test.context.SpringBootTest;
import org.springframework.test.context.ActiveProfiles;
import org.springframework.test.context.junit4.SpringRunner;

/**
 * @author Gettler
 * @date 2024/06/13
 */
@ActiveProfiles("topic")
@RunWith(SpringRunner.class)
@SpringBootTest(classes = RabbitmqApplication.class, webEnvironment =
        SpringBootTest.WebEnvironment.RANDOM_PORT)
public class StudentOfClass1Consumer {
    private static final Logger logger = LoggerFactory.getLogger(StudentOfClass1Consumer.class);

    @Test
    public void testStudentOfClass1Consumer() throws Exception {
        // 创建一个connection
        Connection connection = RabbitMqConnectionFactory.getSingleInstanceConnection();
        // 创建一个channel
        Channel channel = connection.createChannel();
        // 声明交换机
        channel.exchangeDeclare("topic", BuiltinExchangeType.TOPIC);
        // 创建Q1队列
        channel.queueDeclare("student_of_class1", false, false, false, null);
        // 绑定队列与交换机
        channel.queueBind("student_of_class1", "topic", "class1.#");
        // 消费消息
        DeliverCallback deliverCallback = (consumerTag, message) -> {
            logger.info("获得消息:" + new String(message.getBody()));
        };
        CancelCallback cancelCallback = (consumerTag) -> {
            logger.info("消息消费被中断");
        };
        channel.basicConsume("student_of_class1", true, deliverCallback, cancelCallback);
    }
}
消费者B(模拟操作系统老师):
package com.gettler.rabbitmq.topic;

import com.gettler.rabbitmq.RabbitmqApplication;
import com.gettler.rabbitmq.config.RabbitMqConnectionFactory;
import com.rabbitmq.client.*;
import org.junit.Test;
import org.junit.runner.RunWith;
import org.slf4j.Logger;
import org.slf4j.LoggerFactory;
import org.springframework.boot.test.context.SpringBootTest;
import org.springframework.test.context.ActiveProfiles;
import org.springframework.test.context.junit4.SpringRunner;

/**
 * @author Gettler
 * @date 2024/06/13
 */
@ActiveProfiles("topic")
@RunWith(SpringRunner.class)
@SpringBootTest(classes = RabbitmqApplication.class, webEnvironment =
        SpringBootTest.WebEnvironment.RANDOM_PORT)
public class TeacherConsumer {
    private static final Logger logger = LoggerFactory.getLogger(TeacherConsumer.class);

    @Test
    public void testTeacherConsumer() throws Exception {
        // 创建一个connection
        Connection connection = RabbitMqConnectionFactory.getSingleInstanceConnection();
        // 创建一个channel
        Channel channel = connection.createChannel();
        // 声明交换机
        channel.exchangeDeclare("topic", BuiltinExchangeType.TOPIC);
        // 创建Q1队列
        channel.queueDeclare("teacher_of_OS", false, false, false, null);
        // 绑定队列与交换机
        channel.queueBind("teacher_of_OS", "topic", "#.OS.#");
        // 消费消息
        DeliverCallback deliverCallback = (consumerTag, message) -> {
            System.out.println("获得消息:" + new String(message.getBody()));
        };
        CancelCallback cancelCallback = (consumerTag) -> {
            System.out.println("消息消费被中断");
        };
        channel.basicConsume("teacher_of_OS", true, deliverCallback, cancelCallback);
    }
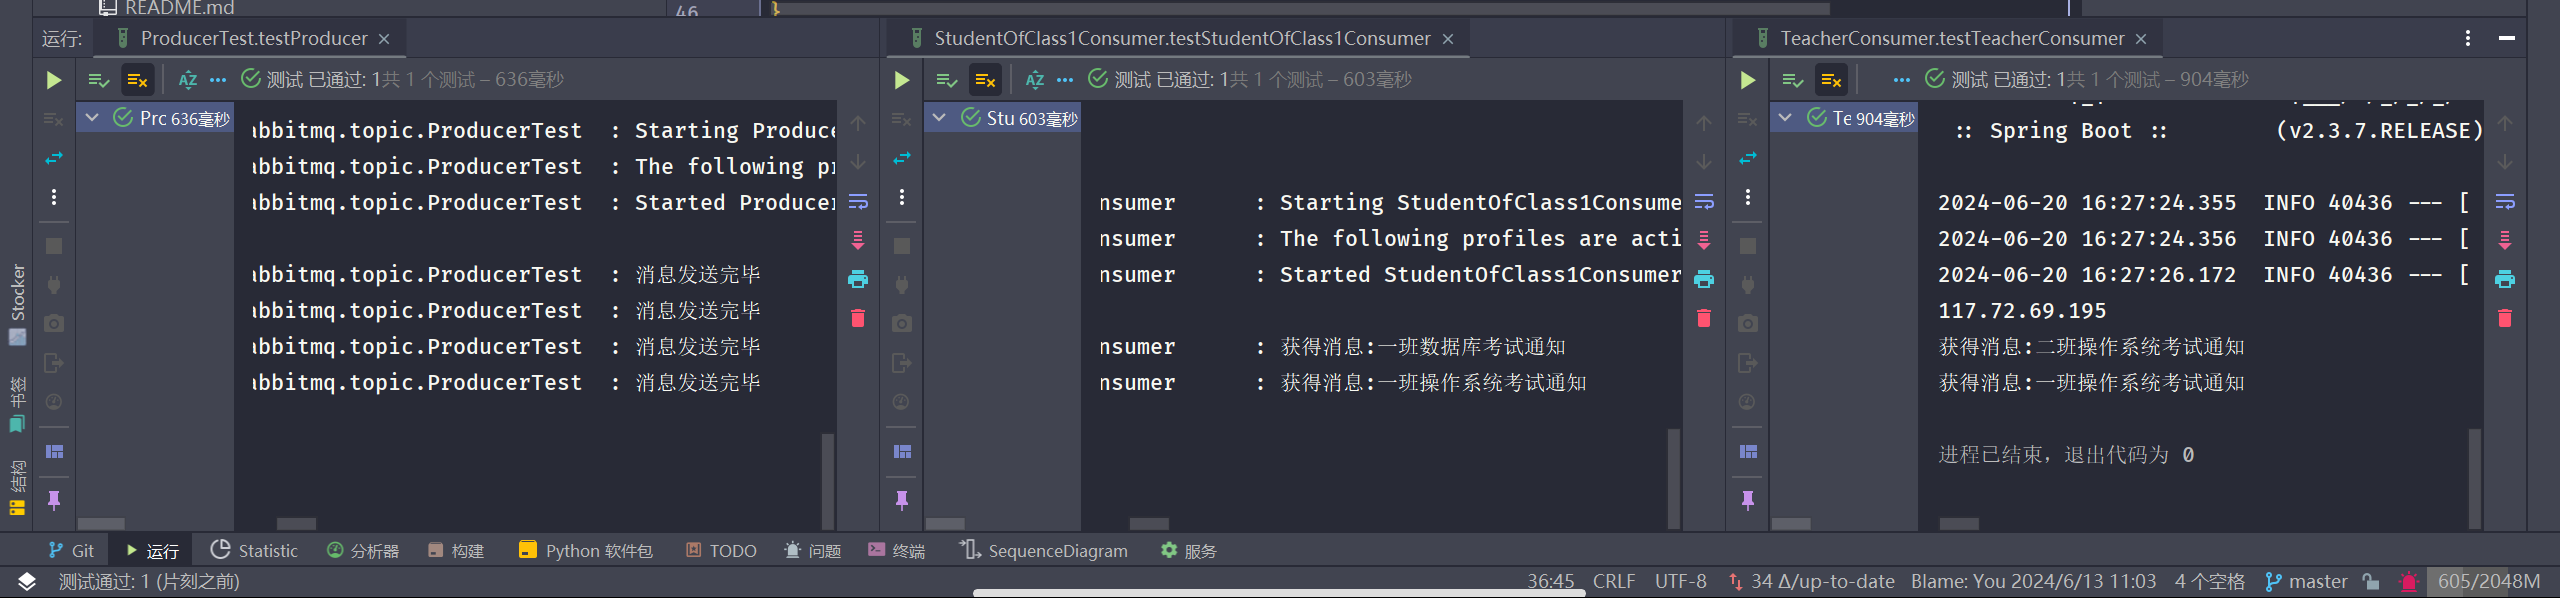
}
谷粒商城 RabbitMQ 学习笔记
新建Maven项目
添加依赖
<dependency>
        <groupId>com.rabbitmq</groupId>
        <artifactId>amqp-client</artifactId>
        <version>5.0.0</version>
</dependency>
编写发送端
package org.example;

import java.util.concurrent.TimeoutException;

import com.rabbitmq.client.Channel;
import com.rabbitmq.client.Connection;
import com.rabbitmq.client.ConnectionFactory;

public class Send
{
    //队列名称
    private final static String QUEUE_NAME = "helloMQ";

    public static void main(String[] argv) throws java.io.IOException, TimeoutException
    {
        /**
         * 创建连接连接到MabbitMQ
         */
        ConnectionFactory factory = new ConnectionFactory();
        //设置MabbitMQ所在主机ip或者主机名
        factory.setHost("localhost");
        //创建一个连接
        Connection connection = factory.newConnection();
        //创建一个频道
        Channel channel = connection.createChannel();
        //指定一个队列
        channel.queueDeclare(QUEUE_NAME, false, false, false, null);
        //发送的消息
        String message = "hello world!";
        //往队列中发出一条消息
        channel.basicPublish("", QUEUE_NAME, null, message.getBytes());
        System.out.println(" [x] Sent '" + message + "'");
        //关闭频道和连接
        channel.close();
        connection.close();
     }
}
编写接收端
package org.example;

import com.rabbitmq.client.*;

import java.io.IOException;

public class Recv {

    // 队列名称
    private final static String QUEUE_NAME = "helloMQ";

    public static void main(String[] argv) throws Exception {

        // 打开连接和创建频道,与发送端一样
        ConnectionFactory factory = new ConnectionFactory();
        factory.setHost("localhost");
        Connection connection = factory.newConnection();
        Channel channel = connection.createChannel();
        //声明队列,主要为了防止消息接收者先运行此程序,队列还不存在时创建队列。
        channel.queueDeclare(QUEUE_NAME, false, false, false, null);
        System.out.println(" [*] Waiting for messages. To exit press CTRL+C");

        //创建消费者
        Consumer consumer = new DefaultConsumer(channel) {
            @Override
            public void handleDelivery(String consumerTag, Envelope envelope, AMQP.BasicProperties properties,
                    byte[] body) throws IOException {
                String message = new String(body, "UTF-8");
                System.out.println(" [x] Received '" + message + "'");
            }
        };
        channel.basicConsume(QUEUE_NAME, true, consumer);
    }
}
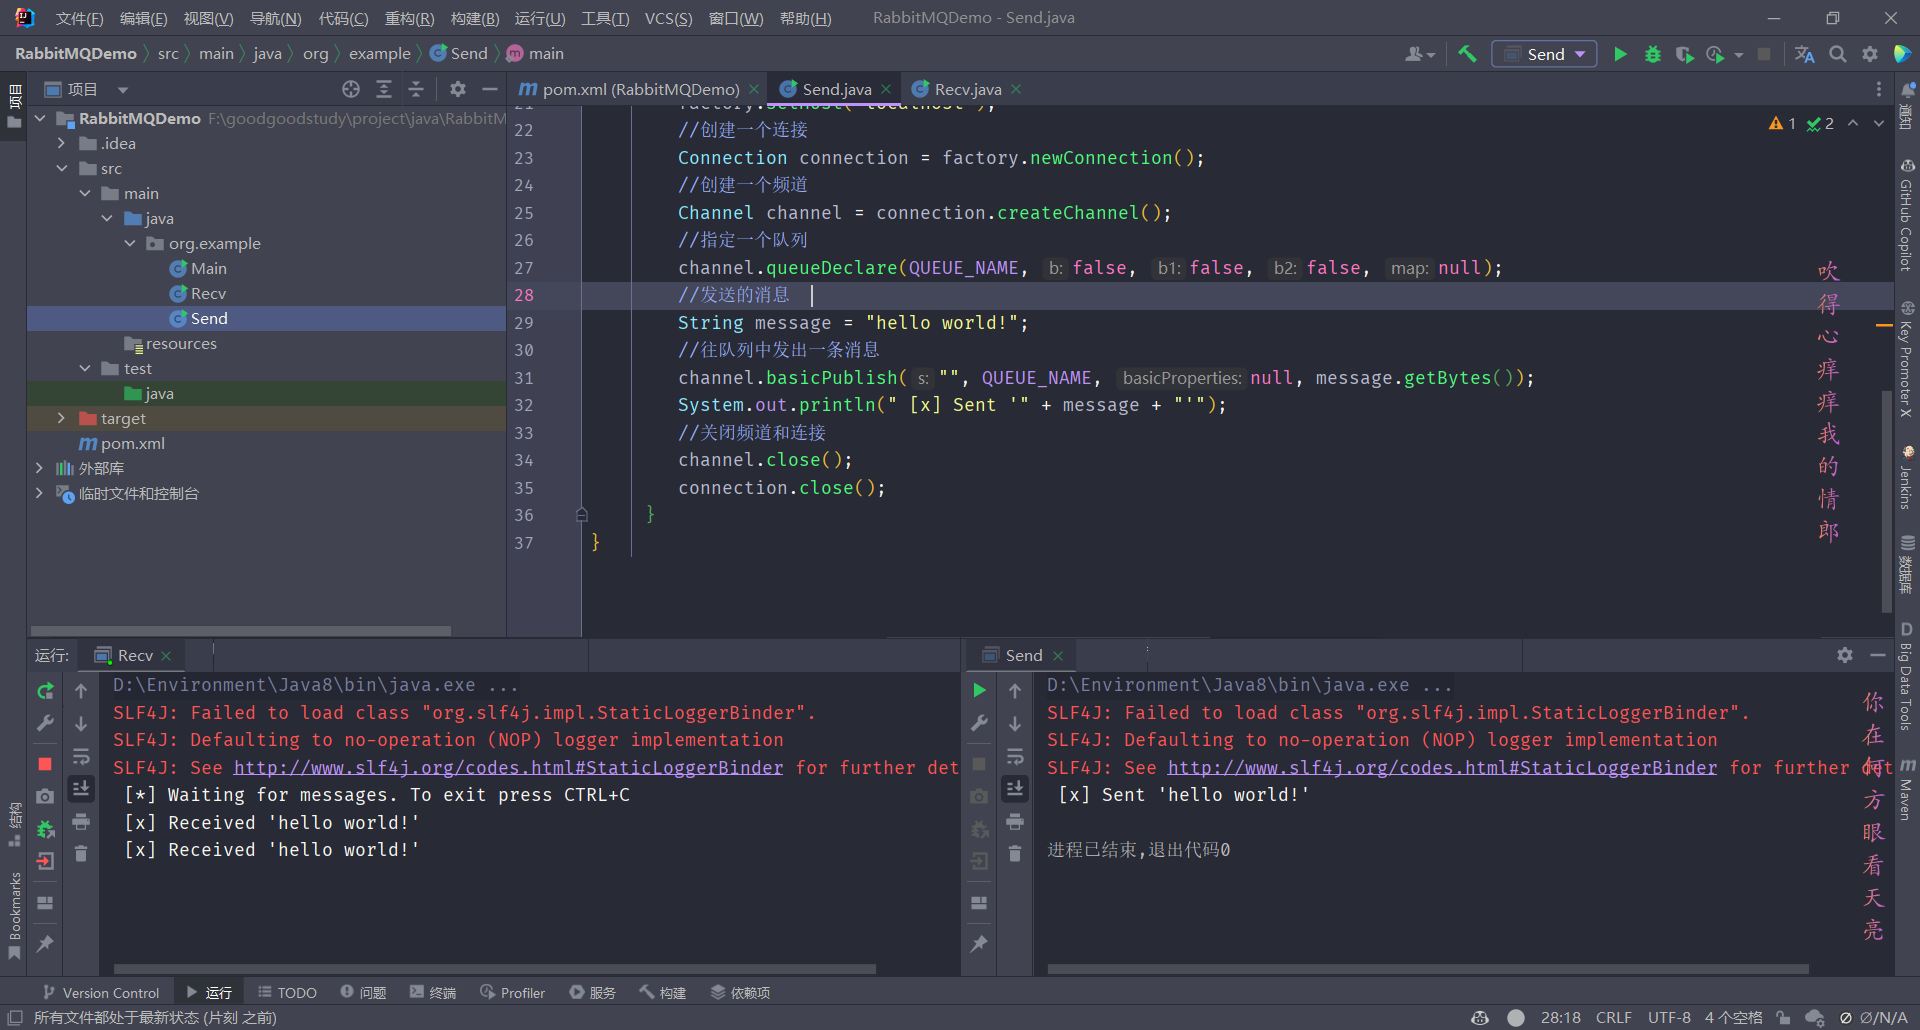
运行接收端
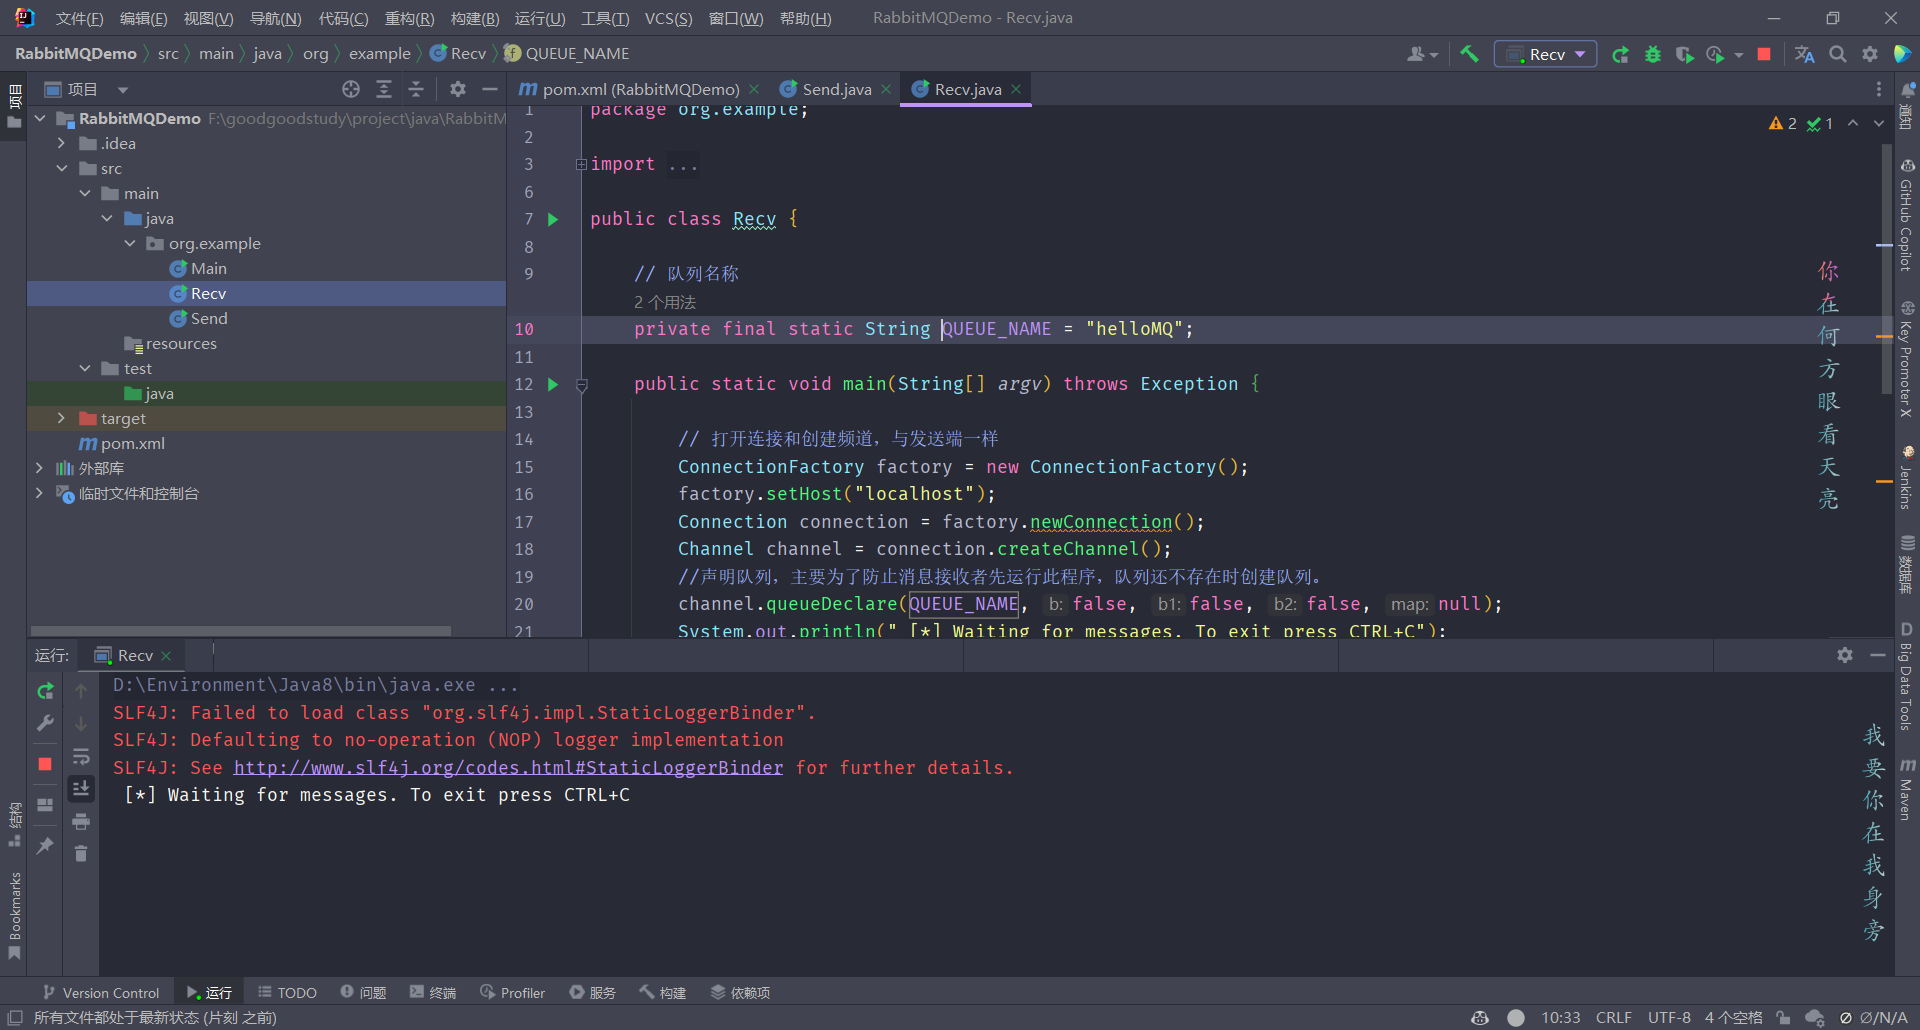
运行发送端,每运行一次发送一次消息
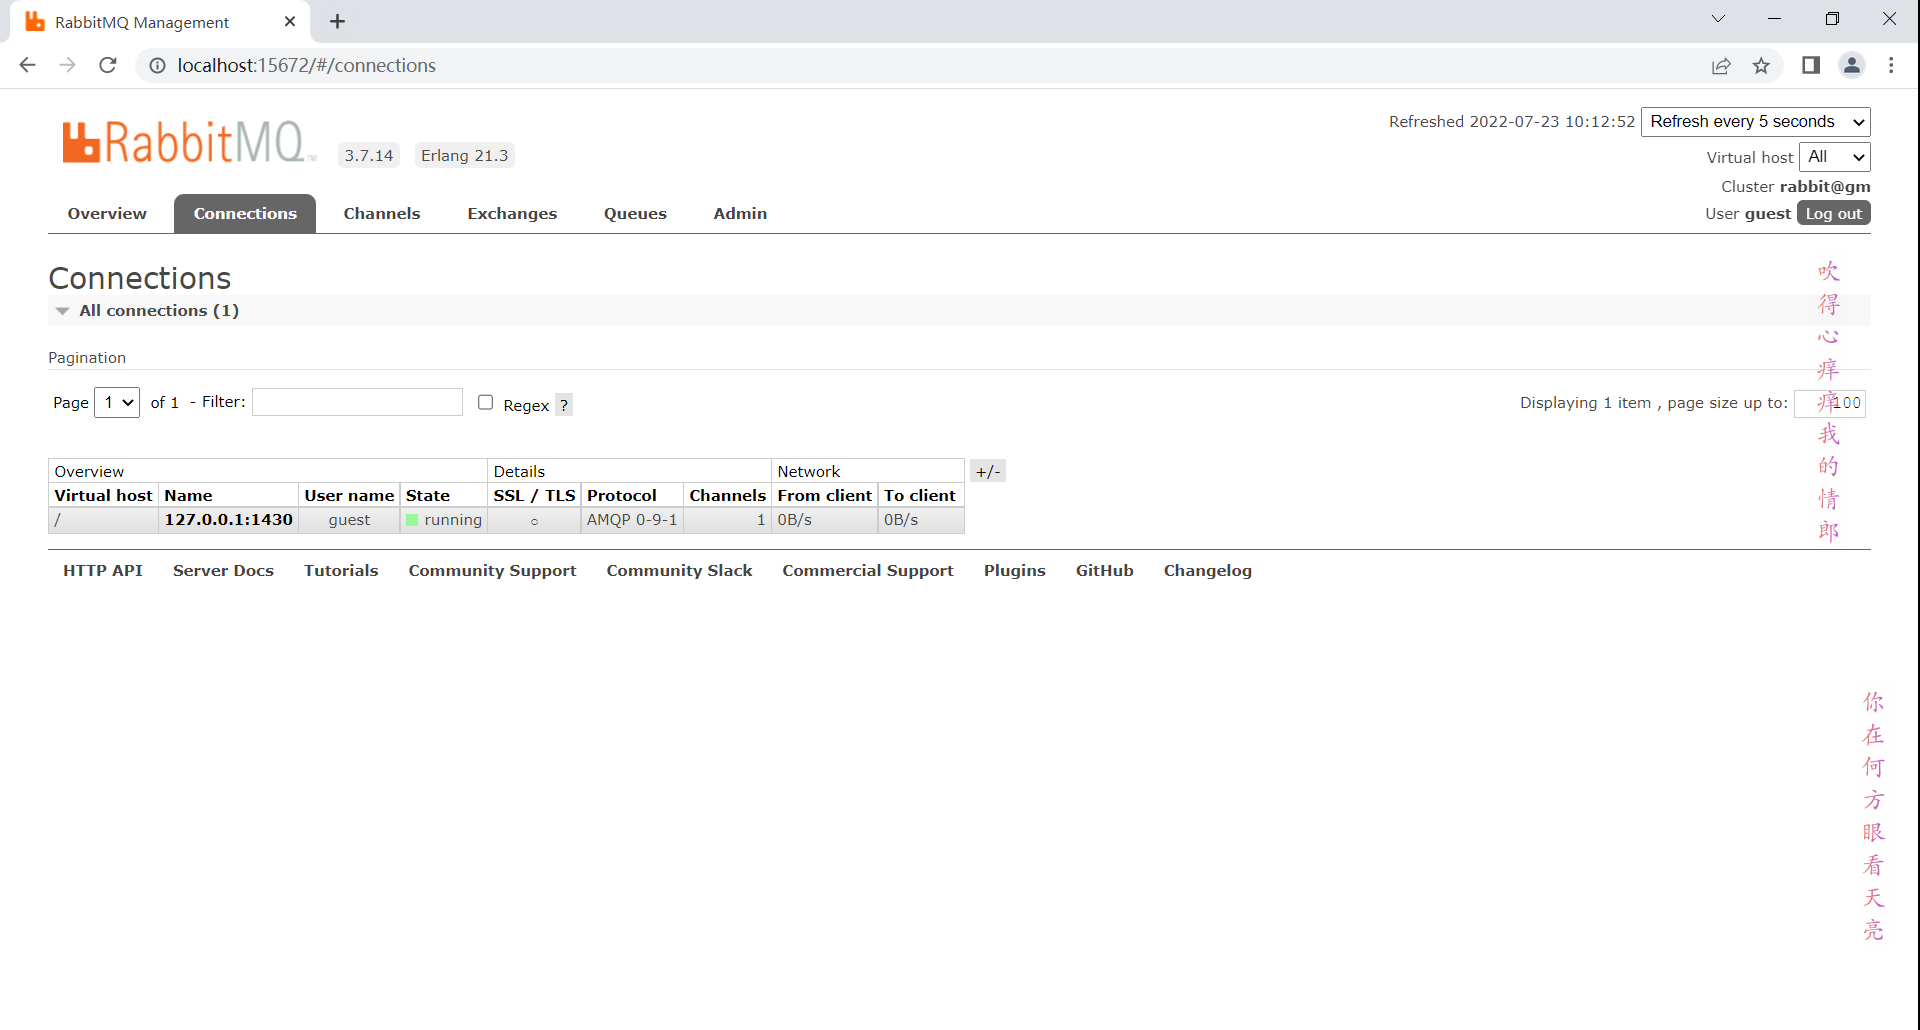
管理网站上有接收端的连接(发送端发送后便断开连接了)
添加依赖
<dependency>
    <groupId>org.springframework.boot</groupId>
    <artifactId>spring-boot-starter-amqp</artifactId>
</dependency>
编写配置文件
spring.rabbitmq.host=192.168.3.200
spring.rabbitmq.port=5672
spring.rabbitmq.virtual-host=/
创建Exchange
public void createExchange() {
    DirectExchange directExchange = new DirectExchange("hello-java-exchange", true, false);
    amqpAdmin.declareExchange(directExchange);
}
创建Queue
public void createQueue() {
    Queue queue = new Queue("hello-java-queue", true, false, false);
    amqpAdmin.declareQueue(queue);
}
连接Queue和Exchange
public void createBinding() {
    Binding binding = new Binding("hello-java-queue", Binding.DestinationType.QUEUE, "hello-java-exchange", "hello.java", null);
    amqpAdmin.declareBinding(binding);
}
发送消息
public void sendMessage() {
    String msg = "hello world";
    List<String> s = new ArrayList<>();
    s.add(msg);
    s.add("List");
    rabbitTemplate.convertAndSend("hello-java-exchange", "hello.java", s, new CorrelationData(UUID.randomUUID().toString()));
}
接收消息
想要接受对象消息,需使用JSON序列化机制,进行消息转换
编写MyRabbitConfig配置类
@Configuration
public class MyRabbitConfig {
    @Autowired
    RabbitTemplate rabbitTemplate;

    /**
     * 使用JSON序列化机制,进行消息转换
     * @return
     */
    @Bean
    public MessageConverter messageConverter() {
        return new Jackson2JsonMessageConverter();
    }
}
使用RabbitListener注解监听队列,该注解参数可以是Object content, Message message, Channel channel。
@RabbitListener(queues = {"hello-java-queue"})
public void receiveMessage(Object message) {
    System.out.println("接受到消息内容:" + message);
}
可靠抵达
编写配置文件
# 开启发送端确认
spring.rabbitmq.publisher-confirm-type=correlated
# 开启发送端消息抵达队列的确认
spring.rabbitmq.publisher-returns=true
# 抵达队列后以异步发送优先回调抵达队列后的回调returnconfirm
spring.rabbitmq.template.mandatory=true
# 手动ack消息
spring.rabbitmq.listener.simple.acknowledge-mode=manual
将MyRabbitConfig修改为
@Configuration
public class MyRabbitConfig {
    @Autowired
    RabbitTemplate rabbitTemplate;

    /**
     * 使用JSON序列化机制,进行消息转换
     *
     * @return
     */
    @Bean
    public MessageConverter messageConverter() {
        return new Jackson2JsonMessageConverter();
    }

    @PostConstruct // MyRabbitConfig对象创建完成后执行该方法
    public void initRabbitTemplate() {
        rabbitTemplate.setConfirmCallback(new RabbitTemplate.ConfirmCallback() {
            /**
             * 消息抵达节点的话ack就为true
             * @param correlationData   当前消息的唯一关联数据(消息唯一ID)
             * @param ack 消息是否成功收到
             * @param cause 失败原因
             */
            @Override
            public void confirm(CorrelationData correlationData, boolean ack, String cause) {
                System.out.println("confirming...correlationData{" + correlationData + "},ack{" + ack + "},cause{" + cause + "}");
            }
        });
        rabbitTemplate.setReturnCallback(new RabbitTemplate.ReturnCallback() {
            /**
             * 没抵达队列,触发这个失败回调函数
             * @param message
             * @param replyCode
             * @param replyText
             * @param exchange
             * @param routingKey
             */
            @Override
            public void returnedMessage(Message message, int replyCode, String replyText, String exchange, String routingKey) {
                System.out.println("Unreachable...message{" + message + "},replyCode{" + replyText + "},exchange{" + exchange + "},routingKey{" + routingKey + "}");
            }
        });
    }
}
监听队列方法修改为
@RabbitListener(queues = {"hello-java-queue"})
public void receiveMessage(Message message, List list, Channel channel) throws IOException {
    System.out.println("接受到消息内容:" + list);
    // channel内按顺序递增
    long deliveryTag = message.getMessageProperties().getDeliveryTag();
    System.out.println(deliveryTag);
    // 签收
    try {
        channel.basicAck(deliveryTag, false); // 是否批量签收
    } catch (Exception e) {
        // 网络中断
        // b1 = false 丢弃, b1 = true 发回服务器,服务器重新入队。
        channel.basicNack(deliveryTag, false, false);
    }
}
Asp.Net使用MQTT
https://www.cnblogs.com/weskynet/p/16441219.html
集群
yaml
---
# 1. 创建命名空间
apiVersion: v1
kind: Namespace
metadata:
  name: rabbitmq

---
# 2. 权限配置
apiVersion: v1
kind: ServiceAccount
metadata:
  name: rabbitmq-discovery
  namespace: rabbitmq

---
kind: Role
apiVersion: rbac.authorization.k8s.io/v1
metadata:
  name: rabbitmq-discovery
  namespace: rabbitmq
rules:
- apiGroups: [""]
  resources: ["endpoints"]
  verbs: ["get", "list", "watch"]

---
kind: RoleBinding
apiVersion: rbac.authorization.k8s.io/v1
metadata:
  name: rabbitmq-discovery
  namespace: rabbitmq
subjects:
- kind: ServiceAccount
  name: rabbitmq-discovery
  namespace: rabbitmq
roleRef:
  apiGroup: rbac.authorization.k8s.io
  kind: Role
  name: rabbitmq-discovery

---
# 3. 集群配置文件
apiVersion: v1
kind: ConfigMap
metadata:
  name: rabbitmq-config
  namespace: rabbitmq
data:
  rabbitmq.conf: |
    cluster_formation.peer_discovery_backend = rabbit_peer_discovery_k8s
    cluster_formation.k8s.address_type = hostname
    cluster_formation.k8s.host = kubernetes.default.svc.cluster.local
    cluster_formation.k8s.service_name = rabbitmq-headless
    cluster_formation.k8s.hostname_suffix = .rabbitmq-headless.rabbitmq.svc.cluster.local
    vm_memory_high_watermark.relative = 0.4
    disk_free_limit.absolute = 2GB

---
# 4. 无头服务
apiVersion: v1
kind: Service
metadata:
  name: rabbitmq-headless
  namespace: rabbitmq
spec:
  clusterIP: None
  selector:
    app: rabbitmq
  ports:
  - name: epmd
    port: 4369
  - name: cluster-rpc
    port: 25672

---
# 5. 高可用有状态集
apiVersion: apps/v1
kind: StatefulSet
metadata:
  name: rabbitmq
  namespace: rabbitmq
spec:
  serviceName: "rabbitmq-headless"
  replicas: 3
  selector:
    matchLabels:
      app: rabbitmq
  template:
    metadata:
      labels:
        app: rabbitmq
    spec:
      serviceAccountName: rabbitmq-discovery
      # 保持 999 运行,这是 RabbitMQ 官方镜像的 UID
      securityContext:
        fsGroup: 999
      containers:
      - name: rabbitmq
        image: 192.168.30.12/proxy/rabbitmq:3-management
        ports:
        - containerPort: 5672
          name: amqp
        - containerPort: 15672
          name: management
        env:
        - name: MY_POD_NAME
          valueFrom:
            fieldRef:
              fieldPath: metadata.name
        - name: RABBITMQ_DEFAULT_USER
          value: "admin"
        - name: RABBITMQ_DEFAULT_PASS
          value: "mq@123"
        - name: RABBITMQ_ERLANG_COOKIE
          value: "secret_cookie_for_cluster"
        - name: RABBITMQ_USE_LONGNAME
          value: "true"
        - name: RABBITMQ_PLUGINS_CONFIG_FILE
          value: "/etc/rabbitmq/enabled_plugins"
        - name: K8S_SERVICE_NAME
          value: "rabbitmq-headless"
        - name: RABBITMQ_NODENAME
          value: "rabbit@$(MY_POD_NAME).rabbitmq-headless.rabbitmq.svc.cluster.local"
        volumeMounts:
        - name: rabbitmq-data
          mountPath: /var/lib/rabbitmq
        - name: plugins-conf
          mountPath: /etc/rabbitmq/enabled_plugins
          subPath: enabled_plugins
        - name: config-volume
          mountPath: /etc/rabbitmq/rabbitmq.conf
          subPath: rabbitmq.conf
      initContainers:
      - name: config
        image: 192.168.30.12/proxy/busybox
        # --- 重点修改部分 ---
        # 1. 写入插件配置
        # 2. 如果存在 .erlang.cookie,强制修改权限为 600,并确保归属为 999
        command:
        - sh
        - -c
        - |
          echo "[rabbitmq_peer_discovery_k8s,rabbitmq_management]." > /etc/rabbitmq/enabled_plugins;
          if [ -f /var/lib/rabbitmq/.erlang.cookie ]; then
            chmod 600 /var/lib/rabbitmq/.erlang.cookie;
            chown 999:999 /var/lib/rabbitmq/.erlang.cookie;
          fi
        volumeMounts:
        - name: plugins-conf
          mountPath: /etc/rabbitmq
        - name: rabbitmq-data
          mountPath: /var/lib/rabbitmq # 这里必须挂载 data 目录才能修改权限
      volumes:
      - name: plugins-conf
        emptyDir: {}
      - name: config-volume
        configMap:
          name: rabbitmq-config
  volumeClaimTemplates:
  - metadata:
      name: rabbitmq-data
    spec:
      accessModes: [ "ReadWriteOnce" ]
      storageClassName: "ceph-rbd"
      resources:
        requests:
          storage: 10Gi

---
# 6. 固定 IP 服务
apiVersion: v1
kind: Service
metadata:
  name: rabbitmq-external-svc
  namespace: rabbitmq
  annotations:
    metallb.universe.tf/allow-shared-ip: "true"
spec:
  type: LoadBalancer
  loadBalancerIP: 192.168.30.40
  ports:
    - name: amqp
      port: 5672
      targetPort: 5672
    - name: management
      port: 15672
      targetPort: 15672
  selector:
    app: rabbitmq
shell
kubectl exec -it rabbitmq-0 -n rabbitmq -- rabbitmqctl set_policy ha-all "^" '{"ha-mode":"all","ha-sync-mode":"automatic"}'shell
# 1. 停止 rabbitmq-1 的应用进程
kubectl exec -it rabbitmq-1 -n rabbitmq -- rabbitmqctl stop_app

# 2. 重置 rabbitmq-1 的状态(清除它之前的独立身份)
kubectl exec -it rabbitmq-1 -n rabbitmq -- rabbitmqctl reset

# 3. 加入到 rabbitmq-0
kubectl exec -it rabbitmq-1 -n rabbitmq -- rabbitmqctl join_cluster rabbit@rabbitmq-0.rabbitmq-headless.rabbitmq.svc.cluster.local

# 4. 重新启动应用进程
kubectl exec -it rabbitmq-1 -n rabbitmq -- rabbitmqctl start_app